Introduction
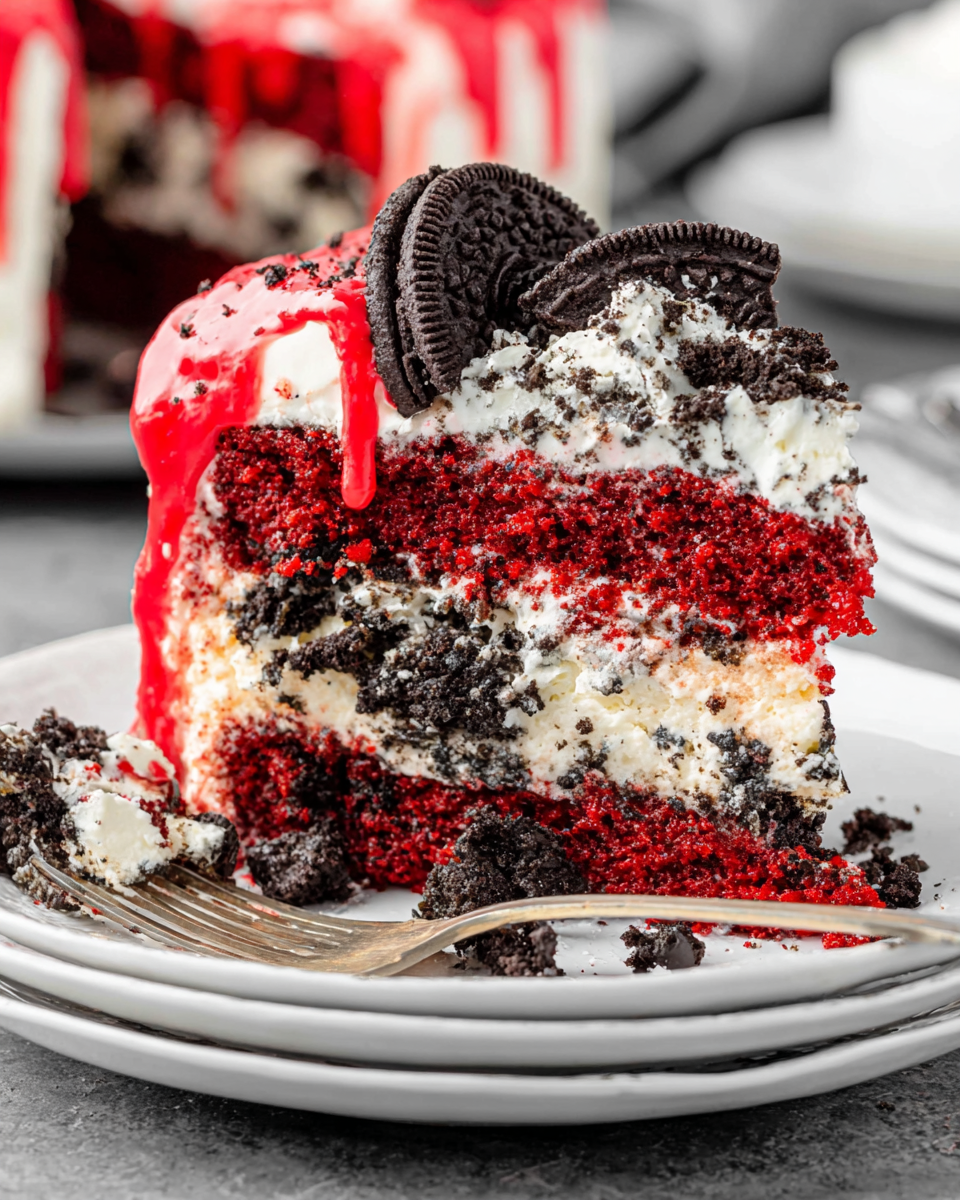
Indulging in a decadent dessert can brighten any occasion, and nothing captivates quite like an Oreo Red Velvet Cheesecake Drip Cake. This showstopper balances the rich flavors of red velvet, creamy cheesecake, and your favorite chocolate sandwich cookies.
With its eye-catching layers and luscious chocolate drip, this cake is not just a treat for the taste buds but also for the eyes. Perfect for celebrations or simply to satisfy your sweet tooth, it's a cake that promises to impress.
Ingredients
- 1 ½ cups all-purpose flour
All-purpose flour provides the structure for the cake, helping it rise while keeping the crumb tender. It acts as the backbone of the cake and is essential for achieving the desired texture. - 1 cup granulated sugar
Sugar sweetens the cake and contributes to its moistness. It also helps with browning during baking, giving a wonderful golden crust while maintaining a soft interior. - ½ cup unsweetened cocoa powder
Cocoa powder adds a rich chocolate flavor and depth to the cake. It complements the red velvet beautifully, enhancing the overall experience with its warm, earthy notes. - 1 teaspoon baking soda
Baking soda serves as a leavening agent, helping the cake rise. It works best in conjunction with acidic ingredients like vinegar or buttermilk, ensuring a light, fluffy texture. - ½ teaspoon salt
Salt enhances the flavor of all the cake's components. It balances sweetness and adds depth, making each bite more complex and satisfying. - 1 cup vegetable oil
Oil keeps the cake moist and tender. It adds richness without weighing the cake down, leading to a delightful mouthfeel and texture. - 1 cup buttermilk
Buttermilk gives the cake its signature tang and contributes to a tender crumb. It reacts with the baking soda to create a light and airy cake. - 2 large eggs
Eggs provide structure and stability to the cake. They also add moisture, richness, and contribute to the overall texture, helping the cake bind together perfectly. - 1 tablespoon red food coloring
Red food coloring is what gives red velvet cake its distinct color. It enhances the visual appeal, transforming a simple cake into a vibrant masterpiece. - 1 teaspoon vanilla extract
Vanilla extract adds a warm, aromatic flavor that rounds out the cake's profile. It enhances the sweetness and harmonizes the other flavors beautifully. - 16 ounces cream cheese, softened
Cream cheese is the key ingredient for a rich and creamy cheesecake layer. It provides a tangy flavor that complements the sweetness of the cake. - 1 cup powdered sugar
Powdered sugar sweetens the cheesecake layer and allows for easy mixing into the cream cheese for a smooth texture. It helps create the perfect balance of taste without being overly grainy. - 1 teaspoon vanilla extract (for cheesecake)
This addition of vanilla extract in the cheesecake enhances its flavor. It ensures a uniform taste, bringing out the cheesecake's inherent sweetness. - 1 cup heavy cream
Heavy cream is essential for both the drip glaze and adding body to the frosting. When whipped, it becomes light and fluffy, creating a luxurious texture in every bite. - 1 cup crushed Oreo cookies
Crushed Oreo cookies not only add a favorite chocolate flavor but also provide a crispy texture to the layers. They enhance the overall theme of the cake and add contrast to the soft cheesecake. - 4 ounces semi-sweet chocolate, melted
Melted chocolate is used to create the decadent drip effect around the edges of the cake. It adds a glossy finish, making the cake look elegant and indulgent.
Directions & Preparation
Step 1: Preheat your oven to 350°F (175°C).
Preheating the oven ensures that your cake bakes evenly from the moment it goes in. This step is crucial for achieving the right rise and texture, preventing the cake from becoming dense or uneven.
Step 2: Grease and flour three 6-inch round cake pans.
Properly greasing and flouring the pans prevents the cake layers from sticking, ensuring they release cleanly after baking. This step is essential for maintaining the integrity of your layers and making assembly easier.
Step 3: In a large mixing bowl, combine flour, sugar, cocoa powder, baking soda, and salt.
Mixing the dry ingredients first helps to evenly distribute the leavening agents and ensure the cake rises correctly. It also prepares a uniform base before adding the wet ingredients, leading to a consistent batter.
Step 4: In another bowl, mix together oil, buttermilk, eggs, red food coloring, and vanilla extract.
Combining wet ingredients separately helps to blend them thoroughly before integrating them into the dry mix. This ensures that the coloring and flavor are evenly distributed throughout the batter, resulting in a vibrant red hue.
Step 5: Gradually add the wet ingredients to the dry ingredients, mixing until smooth.
Gradually combining the wet and dry ingredients prevents flour from flying everywhere and ensures a gentle mixing that keeps the batter airy. It's important not to overmix at this stage to maintain a tender cake.
Step 6: Divide the batter evenly between the prepared pans and smooth the tops.
Evenly dividing the batter ensures uniform baking, allowing all layers to have a consistent height and finish. Smoothing the tops before baking also helps them rise evenly and look neat.
Step 7: Bake for 25-30 minutes or until a toothpick comes out clean.
Baking for the recommended time ensures the cake is cooked through without drying out. Always checking a few minutes before the timer goes off helps prevent overbaking, which can lead to a tough texture.
Step 8: Allow the cakes to cool in the pans for 10 minutes, then transfer to wire racks to cool completely.
Letting the cakes cool in the pans helps them firm up slightly, making them easier to handle. Transferring to wire racks allows for even coolness, which is vital for proper frosting application.
Step 9: While the cakes cool, prepare the cheesecake layer.
This step utilizes the cooling time efficiently, allowing you to multitask. Preparing the cheesecake layer in advance not only saves time but also ensures it's ready for assembly once the cakes are completely cooled.
Step 10: In a mixing bowl, beat the cream cheese until smooth, then add the powdered sugar and vanilla extract.
Ensuring the cream cheese is fully softened before beating allows it to become silky smooth, which is essential for the texture of the cheesecake layer. Gradually incorporating the powdered sugar helps prevent a grainy texture.
Step 11: Spread the cheesecake layer evenly between the cooled cake layers.
Layering the cheesecake adds a delightful contrast to the fluffy red velvet cake. Spreading it evenly ensures that each bite contains a perfect balance of both flavors, ensuring a harmonious and indulgent dessert.
Step 12: Chill the assembled cake for at least 2 hours to let the cheesecake set.
Chilling the cake is crucial to firm up the cheesecake layer, making it easier to slice and ensuring each slice holds its shape. This step also enhances the flavors as they meld together beautifully.
Step 13: For the frosting, whip the heavy cream until soft peaks form.
Whipping the cream to the right consistency is key for a stable frosting. Soft peaks ensure that the frosting is light and fluffy, creating a beautiful texture that complements the richness of the cake.
Step 14: Frost the top and sides of the chilled cake with the whipped cream.
Frosting the cake after chilling not only makes for an easier application but also locks in the flavors of the cheesecake and cake layers. Making sure the layers are smooth and even creates a polished finish.
Step 15: Drizzle melted chocolate around the edges of the cake for a drip effect.
Creating a drip effect requires precision with the melted chocolate. It enhances the visual aesthetic of the cake while also adding another layer of chocolate flavor that can’t be resisted.
Step 16: Top the cake with crushed Oreos and any remaining whipped cream.
Adding a topping of crushed Oreos provides a delightful crunch and visual appeal, contrasting with the creamy layers below. It also reinforces the flavor theme, making each slice appealing and enticing.

Enhancing the Red Velvet Flavor
To elevate the rich taste of your red velvet cheesecake drip cake, consider incorporating a hint of espresso or coffee. This addition enhances the chocolate flavor without being noticeable, adding depth to your dessert. Simply mix in a teaspoon of instant espresso powder with the dry ingredients for a subtle flavor boost.
The Art of Dripping Chocolate
Achieving the perfect drip effect is both an art and a science. Ensuring your chocolate is slightly cooled but still pourable is crucial. Using a squeeze bottle or a spoon to control the amount of chocolate allows for a beautiful drip that cascades gracefully down the sides of the cake, creating a professional-looking finish.
Choosing the Right Oreos
While classic Oreos are a fan-favorite, experimenting with different flavors can yield delightful results. From mint to peanut butter, the variety of Oreo flavors can add unique layers of taste and texture. Match the Oreo flavor to your personal preference or the occasion to take your cake to the next level.
FAQs
What can I substitute for buttermilk if I don’t have any?
You can easily substitute buttermilk with a mix of regular milk and vinegar or lemon juice. For every cup of buttermilk needed, use 1 tablespoon of vinegar or lemon juice and fill the rest with milk, letting it sit for about 5-10 minutes.
What if my cream cheese frosting is too runny?
If your cream cheese frosting is too runny, try chilling it for a while. Whipping it for a little longer can also help thicken it. If needed, you can add more powdered sugar gradually until you reach the desired consistency.
Can I use different pans for baking this cake?
Yes, you can adapt the recipe for different pan sizes, but baking times may vary. If using larger pans, the cake will likely bake faster, so keep an eye on it and perform the toothpick test earlier.
What if my cake layers are uneven after baking?
If your cake layers are uneven, you can trim the tops with a serrated knife to level them before layering. This ensures a stable base and helps your cake stand tall without wobbling.
What is the best way to cut the cake without messing up the layers?
Using a warm knife is the best method for cutting the cake cleanly. Dip your knife in hot water and wipe it dry before cutting to make clean slices without tearing the layers.
Can the crushed Oreo topping be modified?
Absolutely! You can mix in some crushed nuts or sprinkles with the crushed Oreos for added texture and flavor. This will give your cake a unique twist while still keeping the beloved Oreo crunch.
Conclusion
Creating a Decadent Oreo Red Velvet Cheesecake Drip Cake may require some effort, but the glorious result is well worth it. Each layer combines classic flavors that evoke nostalgia while offering a modern twist that is sure to impress friends and family.
With its stunning appearance and rich flavors, this cake will be the highlight of any gathering. Whether it’s a birthday party or a simple weekend treat, every slice promises a delightful experience.
Recipe Card

Butternut Squash Pasta with Sausage and Spinach for Fall
Ingredients
- 12 ounces of pasta
- 1 medium butternut squash peeled and cubed
- 1 pound of Italian sausage sweet or spicy
- 3 cups fresh spinach
- 1 onion diced
- 3 cloves of garlic minced
- 3 tablespoons olive oil
- 1 teaspoon dried thyme
- Salt and pepper to taste
- 1/2 cup grated Parmesan cheese
Instructions
- Cook the pasta according to package instructions until al dente.
- In a large skillet, heat olive oil over medium heat and sauté the onion until translucent.
- Add minced garlic and Italian sausage to the skillet, breaking it apart, and cook until browned.
- Stir in the butternut squash and thyme, cooking until the squash begins to soften.
- Add fresh spinach and a splash of reserved pasta water, then stir until the spinach wilts.
- Combine the cooked pasta with the sauce, tossing everything together thoroughly.
- Finish with grated Parmesan cheese and serve hot, garnished with extra herbs if desired.


