Introduction
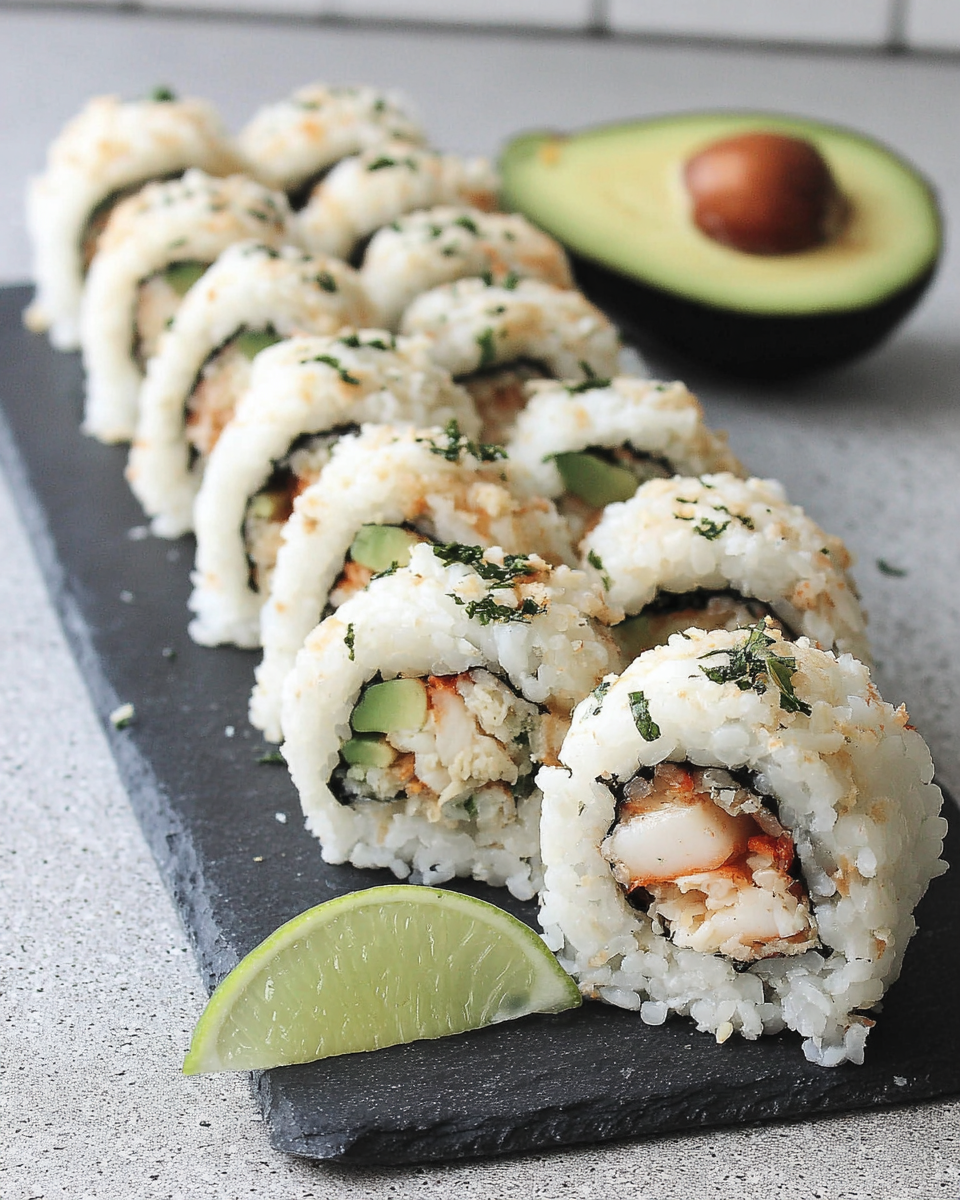
California Crunch Roll Sushi is a delightful fusion delight appreciated by sushi lovers everywhere. The balance of flavors and textures creates a colorful and delicious experience. With a little patience and the right ingredients, you can replicate this restaurant favorite in the comfort of your home.
Making sushi at home can feel intimidating, but California Crunch Rolls are an excellent place to start. This recipe incorporates straightforward techniques that allow even novice cooks to become confident sushi artisans. Gather your ingredients, and let’s embark on this delicious journey!
Ingredients
- 2 cups sushi rice
Sushi rice is short-grain rice that is sticky when cooked, allowing the rolls to hold together. It’s seasoned with rice vinegar, sugar, and salt, giving it the signature sushi flavor. - 2 1/2 cups water
Water is necessary to cook the rice. The right water-to-rice ratio is crucial for achieving the correct texture, ensuring the rice is fluffy and adheres properly to the other ingredients. - 1/3 cup rice vinegar
Rice vinegar provides tanginess to the sushi rice, balancing the flavors and enhancing the overall sushi experience. Its mild sweetness complements the other ingredients. - 2 tablespoons sugar
Sugar adds a touch of sweetness to the rice vinegar mixture, creating a well-rounded flavor profile that complements the freshness of the fillings. - 1 teaspoon salt
Salt is essential for enhancing the flavor of the rice. It also helps to create a savory foundation for the overall dish. - 1 medium cucumber
Cucumber adds a refreshing crunch and moisture to the roll. Its crisp texture contrasts beautifully with the softness of the rice. - 1 ripe avocado
Avocado is creamy and rich, providing a luxurious mouthfeel. It pairs perfectly with the other ingredients, adding depth and richness. - 1/2 cup imitation crab meat
Imitation crab meat gives the roll its quintessential sushi flavor. It’s an affordable and accessible way to enjoy seafood without the need for actual fish. - Nori sheets (4 sheets)
Nori is seaweed that forms the outer layer of the sushi roll. It adds umami flavor and helps hold the sushi together. - 1/2 cup tempura crumbs (optional)
Tempura crumbs add a delightful crunch to the outside of the roll, enhancing texture and making the rolls even more satisfying. - Soy sauce for serving
Soy sauce is the classic condiment for sushi, providing a salty umami flavor that enhances each bite. It can be used for dipping or drizzling.
Directions & Preparation
Step 1: Rinse the sushi rice until the water runs clear.
Cleaning the rice helps remove excess starch that can make it gummy. Rinsing thoroughly ensures that the rice cooks up fluffy and properly sticky, which is crucial for rolling.
Step 2: Cook the rice with water in a rice cooker or pot.
Cooking in a rice cooker ensures perfectly cooked rice. If using a pot, bring it to a boil, then reduce to a simmer and cover. This step is critical; proper cooking will determine the right texture.
Step 3: Mix rice vinegar, sugar, and salt until dissolved and set aside.
Combining these ingredients creates the seasoning that will flavor the rice. Ensuring they are dissolved activates the flavors that will coat the rice and enhance its taste.
Step 4: Once rice is cooked, let it cool slightly and add the vinegar mixture.
Mixing the seasoning into the rice while it’s warm helps it absorb the flavors. This step is where the sushi rice develops its signature taste and texture.
Step 5: Prepare your fillings: julienne cucumber, mash avocado, and flake imitation crab.
Preparing the filling ingredients in a uniform size allows for even distribution within the roll. This step ensures a balanced flavor and makes rolling easier.
Step 6: Lay a nori sheet on a bamboo sushi mat, shiny side down.
Positioning the nori correctly is important for aesthetics and flavor. The shiny side should face out for a beautiful presentation.
Step 7: Spread a thin layer of sushi rice over the nori, leaving an inch at the top.
Applying a thin, even layer of rice is crucial; too much can lead to difficulty in rolling. The gap at the top allows the nori to stick when closed.
Step 8: Place fillings in a line across the center of the rice.
Arranging the fillings in the center ensures they are fully encased by the rice and nori. This careful positioning maximizes flavor in every bite.
Step 9: Roll the sushi tightly using the bamboo mat, pressing gently as you go.
Rolling tightly creates a compact roll that holds together better. Firm but gentle pressure will create the perfect shape without squishing the filling.
Step 10: Slice the roll into 6-8 pieces with a sharp knife.
Using a sharp, wet knife prevents tearing the nori or crushing the roll. Clean cuts enhance presentation and make the sushi easier to eat.
Step 11: Sprinkle tempura crumbs on the outside if desired.
This step adds an extra layer of crunch and visual appeal to the sushi. It’s optional but can enhance the overall texture experience.
Step 12: Serve with soy sauce on the side.
Offering soy sauce allows diners to dip the rolls as they like. This enhances the flavor profile of the California Crunch Roll.

Understanding Sushi Rice's Importance
Sushi rice is foundational to any sushi dish, providing texture and flavor that supports other ingredients. The glutinous nature of short-grain rice ensures it sticks together, creating harmonious rolls. Properly rinsing and seasoning sushi rice is crucial for achieving the ideal taste and mouthfeel, enhancing your sushi experience.
Choosing The Right Fillings
The combination of fillings in a California Crunch Roll is what makes it unique. The creamy avocado, the sweet crunch of cucumber, and the umami flavor of imitation crab complement each other beautifully. Each ingredient should be fresh and cut with care to ensure that you enjoy a balanced flavor profile in every bite.
Mastering The Roll Technique
Rolling sushi may seem daunting, but practice makes perfect. A bamboo sushi mat is your best friend here, helping to achieve a tight, clean roll. Concentrate on rolling firmly but not too tight, allowing the fillings to blend together while keeping the shape intact. With a little patience, your homemade sushi will impress family and friends alike.
FAQs
What can I do if my sushi rice is too sticky?
If your sushi rice is overly sticky, it may be due to excess moisture during cooking. Next time, try reducing the water slightly. Additionally, ensure you rinse the rice thoroughly before cooking to remove excess starch.
Can I substitute imitation crab with real crab?
Absolutely! Fresh crab meat can elevate the flavor of your rolls. Just ensure it's cooked and shredded into manageable pieces for best results.
What if my avocado isn’t ripe enough?
If your avocado is too firm, place it in a brown paper bag for a day or two to ripen. Alternatively, you can slice it thinly and incorporate it into your sushi for a different texture.
How can I make my rolls look more appealing?
To enhance presentation, ensure slices are even and clean. Garnish with sesame seeds or a splash of color using pickled ginger on the side.
What if my rolls are falling apart when sliced?
If the rolls are falling apart, it may be due to not rolling them tightly enough. Ensure you apply gentle but firm pressure while rolling. Additionally, chilling the rolls slightly before slicing can help them firm up.
Can I adjust the amount of rice in the recipe?
Yes, you can scale down or up based on your needs, but be sure to maintain the same rice-to-water ratio for proper cooking. Adjust all other ingredients proportionally.
Conclusion
Creating your own California Crunch Roll Sushi at home can be a rewarding experience. It allows you to explore your culinary creativity while indulging in a delicious treat. Don't be afraid to experiment with different fillings and find what suits your taste best.
With practice, you can master the art of sushi rolling and enjoy a fun activity that’s perfect for gatherings or a calm night in. So gather your ingredients and bring a slice of California to your kitchen!
Recipe Card
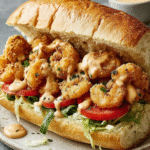
A Flavorful Take on the Classic Shrimp Po’ Boy
Ingredients
- 1 pound large shrimp peeled and deveined
- 1 cup buttermilk
- 1 cup all-purpose flour
- 1 cup cornmeal
- 1 teaspoon cayenne pepper
- 1 teaspoon paprika
- Salt and pepper to taste
- 4 hoagie rolls or French baguettes
- Lettuce shredded
- Tomato sliced
- Remoulade sauce for serving
Instructions
- Prepare the shrimp marinade.
- Combine dry ingredients for the coating.
- Heat the oil for frying.
- Coat the shrimp.
- Fry the shrimp.
- Drain and season the fried shrimp.
- Assemble the po’ boy sandwich.
- Serve immediately.
Notes
Additional serving suggestions: pair with a crisp salad, garlic bread, or roasted seasonal vegetables for balance.
For make-ahead, prep components separately and assemble just before heating to preserve texture.
Taste and adjust with acid (lemon/vinegar) and salt right at the end to wake up flavors.


