Introduction
As the holiday season approaches, the aroma of baking wafts through homes, becoming synonymous with joy and celebration. One delightful addition to your Christmas confectionery this year could be peppermint meringues. These dainty treats, with their crisp exterior and ethereal insides, evoke memories of snowy landscapes and cozy celebrations.
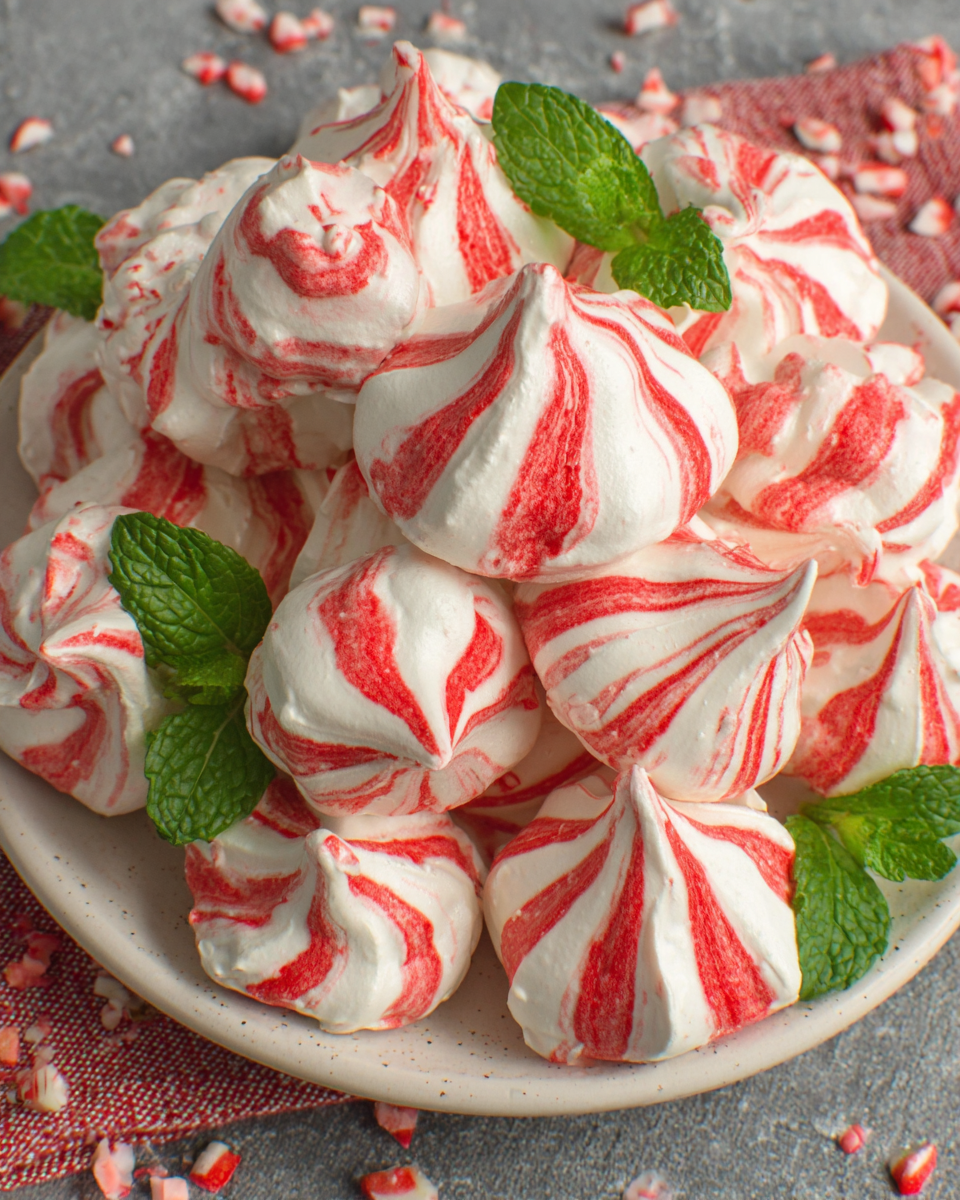
Peppermint meringues are not just visually stunning with their delicate pastel colors; they are also incredibly versatile. Whether enjoyed on their own, used as decorations for festive desserts, or gifted to friends and family, they embody the spirit of the season. With each melt-in-your-mouth bite, they deliver a delightful balance of sweetness and a refreshing minty flavor.
Ingredients
- 4 large egg whites
Egg whites provide the structure for the meringue, allowing it to whip into a stable foam. Freshness is essential; room temperature whites yield the best results as they incorporate air better. - 1 cup granulated sugar
Sugar is crucial in stabilizing the whipped egg whites and achieving the characteristic crisp texture of meringues. The sugar should be added gradually to ensure it dissolves properly. - 1/4 teaspoon cream of tartar
Cream of tartar acts as an acid that stabilizes the egg whites, helping them achieve maximum volume and preventing the meringue from collapsing. - 1 teaspoon peppermint extract
This extract imparts a refreshing minty flavor to the meringues, enhancing their festive spirit. It’s vital to use a high-quality extract for the best flavor. - 1/2 teaspoon vanilla extract
Vanilla complements the peppermint flavor and rounds out the overall sweetness of the meringues, providing a balanced taste. - 1/4 cup crushed peppermint candies
The crushed candies add a delightful crunch and extra burst of peppermint flavor, making the meringues visually appealing and festive.
Directions & Preparation
Step 1: Preheat the oven to 200°F (93°C).
Preheating the oven is essential for meringues, as a steady, low temperature helps to dry them out rather than bake them. This ensures that the exterior becomes crisp while keeping the inside soft and airy. Prepare your baking sheets with parchment paper for easy removal after baking.
Step 2: In a large mixing bowl, combine the egg whites and cream of tartar.
Start by ensuring your mixing bowl is clean and free of any grease, as fat can hinder the egg whites from whipping properly. The cream of tartar helps stabilize the eggs. Use a clean whisk or mixer to begin whipping the egg whites at medium speed until soft peaks form.
Step 3: Gradually add sugar, one tablespoon at a time, while continuing to whip.
Adding sugar gradually allows it to dissolve thoroughly into the egg whites, creating a smooth, glossy mixture. Continue whipping until stiff peaks form, which means the meringue holds its shape and stands upright when you remove the whisk.
Step 4: Mix in the peppermint and vanilla extract.
Incorporating the extracts at this stage adds flavor without compromising the stability of the meringue. Gently fold them in with a spatula to maintain the airy structure you have created. Being careful not to overmix is key to preserving the fluffiness.
Step 5: Gently fold in the crushed peppermint candies.
Folding the crushed candies into the meringue allows for bursts of peppermint flavor in every bite. This step also adds a festive touch with the colorful speckles throughout the meringue mixture. Aim to mix just until combined.
Step 6: Spoon or pipe the meringue mixture onto prepared baking sheets.
You can use a piping bag for elegant shapes or simply spoon dollops if you're looking for a more rustic appearance. Space them out to allow for airflow, ensuring they don’t touch each other, as they will expand slightly while baking.
Step 7: Bake in the preheated oven for 1.5 to 2 hours, until dry.
The low oven temperature will help dehydrate the meringues slowly. They are done when they easily lift from the parchment and feel hard to the touch. Avoid opening the oven during baking, as drafts can disrupt the drying process.
Step 8: Turn off the oven and let the meringues cool inside.
Letting the meringues cool in the oven prevents cracking. As they cool gradually, they maintain their shape and prevent moisture from re-entering. You can leave them in the oven overnight for the best texture.
Step 9: Store in an airtight container until ready to serve.
Properly stored, peppermint meringues can last for weeks. The air-tight container keeps them crisp and prevents humidity from ruining their texture. These treats are perfect for holiday gifting or as a lovely addition to dessert platters.

The Magic of Whipping Egg Whites
The process of whipping egg whites is crucial to creating perfect meringues. When you introduce air into the egg whites, they expand and form a stable foam. Successful whipping depends not only on technique but also on the freshness of the eggs and the cleanliness of your mixing bowl and utensils. A few tips include starting at a lower speed to avoid splattering, and gradually increasing to high speed as soft peaks begin to form.
Adapting for Color and Flavor
The holiday spirit often calls for a splash of color, and peppermint meringues are no exception. You can divide the meringue mixture and add food coloring to create swirls of pastel colors for a more festive presentation. Experimenting with different flavor extracts like almond or espresso can also tailor the meringues to your taste, providing a personalized touch to this classic treat.
Serving Suggestions for Festive Gatherings
Peppermint meringues can serve multiple roles at holiday gatherings. They shine as standalone treats but also make delightful garnishes for hot cocoa, cakes, or ice cream sundaes. Try pairing them with whipped cream and seasonal berries for a simple yet elegant dessert. Their light texture balances out more decadent options while still contributing to the overall festive atmosphere.
FAQs
What if my meringue mixture looks too runny?
If your meringue is runny, it could be due to under-whipping the egg whites or too much humidity in your kitchen. Ensure egg whites are whipped to stiff peaks and try again in drier conditions.
Can I use brown sugar instead of granulated sugar?
Using brown sugar will alter the texture and flavor of the meringues, as they may become chewier and less stable. Granulated sugar is recommended for optimal results.
What can I do if my meringues crack during baking?
Cracking can happen if there are sudden temperature changes. For next time, be sure to preheat the oven and allow meringues to cool gradually for better results.
How do I know when my meringues are fully baked?
Meringues are ready when they feel hard and can be easily lifted from the baking sheet with no stickiness left behind.
Can I substitute the peppermint extract with something else?
Yes, you can substitute other flavor extracts, but ensure they complement the overall taste; almond and vanilla are good alternatives.
Why didn't my meringues rise properly?
If your meringues are flat, it may be due to insufficient whipping or the presence of grease in the mixing bowl. Make sure all your tools are clean and dry.
Conclusion
Peppermint meringues are more than just a delightful treat; they encapsulate the spirit of the holiday season in a beautiful, mouthwatering form. Their ethereal texture and burst of mint make them a perfect complement to any festive celebration.
As you prepare these light, sweet meringues, remember to enjoy the process and share them with loved ones. Whether you package them up as gifts or serve them at holiday festivities, these meringues are sure to bring smiles and joy to all.
Recipe Card

Elevate Your Lunch with a Chicken Caesar Salad Wrap
Ingredients
- 2 cups cooked chicken shredded
- 4 large romaine lettuce leaves
- ½ cup cherry tomatoes halved
- ¼ cup Parmesan cheese shredded
- ½ cup Caesar dressing
- 4 whole wheat wraps
- Salt and black pepper to taste
Instructions
- Prepare the chicken and vegetables.
- Mix chicken with dressing.
- Add vegetables and cheese to the mixture.
- Assemble the wrap.
- Slice and enjoy!
Notes
Additional serving suggestions: pair with a crisp salad, garlic bread, or roasted seasonal vegetables for balance.
For make-ahead, prep components separately and assemble just before heating to preserve texture.
Taste and adjust with acid (lemon/vinegar) and salt right at the end to wake up flavors.


