Introduction
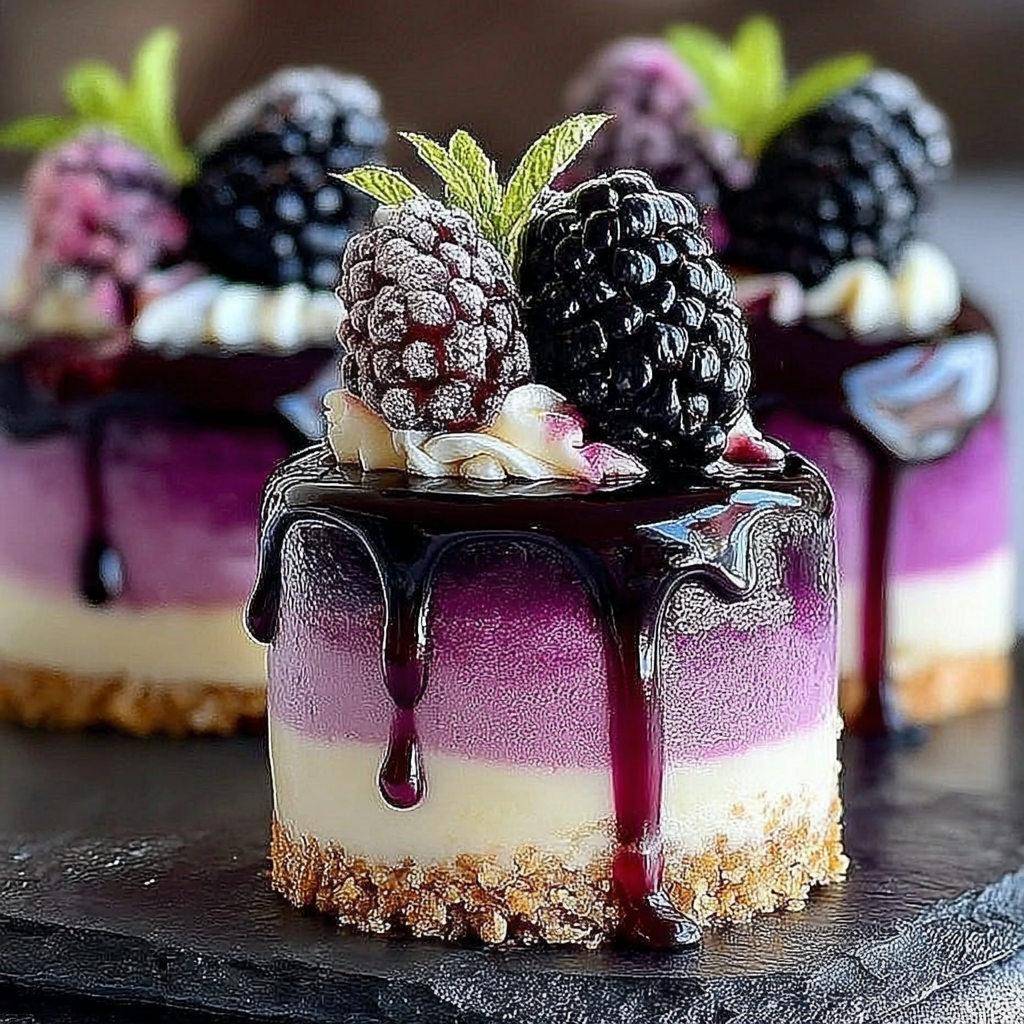
Indulging in a creamy dessert is one of life's simple pleasures, and these Mini Blackberry Mousse Cakes bring the best of both worlds: elegance and ease. With luscious blackberries as the star ingredient, they capture the essence of summer in each delightful bite.
Crafted to impress, these mini cakes are perfect for entertaining or a special evening in. Their airy mousse texture and vibrant blackberries create a stunning presentation that will wow your guests. Let's unlock the secrets to creating this delectable dessert!
Ingredients
- 2 cups fresh blackberries
Blackberries are the key flavor component in this dessert, providing natural sweetness and a vibrant color. Their tanginess adds depth to the mousse. - 1 cup heavy cream
Heavy cream is essential for whipping into soft peaks, contributing to the mousse's light and airy texture. It also adds richness to the flavor. - 1/2 cup granulated sugar
Sugar sweetens the mousse while helping to stabilize the whipped cream. Adjusting the amount can control the flavor balance. - 1 teaspoon vanilla extract
Vanilla enhances the overall flavor profile, adding warmth that pairs beautifully with the berries. - 1/4 cup water
Water is used to dissolve the gelatin, facilitating the setting of the mousse while keeping the texture smooth. - 2 teaspoons powdered gelatin
Powdered gelatin helps the mousse achieve the right consistency. It ensures the mixture holds its shape without becoming too dense. - for garnish: extra blackberries and mint leaves
These garnishes not only add visual appeal but also complement the flavor, making the dessert look fresh and inviting.
Directions & Preparation
Step 1: Prepare the blackberries by pureeing half and mashing the other half gently.
This step allows for a dual-texture experience in the mousse. The pureed blackberries provide a smooth, creamy consistency while the mashed ones add a pleasant burst of fruitiness.
Step 2: Dissolve the gelatin in warm water and let it bloom.
Dissolving the gelatin properly ensures it activates without forming clumps. This step is crucial to achieving a silky texture in the final mousse.
Step 3: Whip the heavy cream with sugar and vanilla until soft peaks form.
Whipping the cream to the right consistency is key. Soft peaks mean the cream is aerated enough to give volume without being too stiff or overwhipped.
Step 4: Combine the blackberry puree with the whipped cream and gelatin mixture.
Gently folding the puree into the whipped cream ensures the mixture retains its airiness. This method maintains the light texture essential for mousse.
Step 5: Spoon the mousse into mini cake molds and chill.
Chilling allows the gelatin to set properly, transforming the mixture from a pourable state to a delightful mousse. Patience here pays off with a firmer texture.
Step 6: Once set, remove from molds and garnish with fresh blackberries and mint.
Unmolding should be done gently to keep the mini cakes intact. The garnishes not only elevate the presentation but also enhance the flavor experience.

Choosing the Best Blackberries
Selecting ripe blackberries is essential for achieving the best flavor. Look for berries that are plump, firm, and have a deep, rich color. Avoid any with dull skin or blemishes. Ripe blackberries will yield a natural sweetness and a vibrant hue in the mousse.
Gelatin vs. Agar-Agar: What to Use?
While this recipe uses gelatin for setting, some may prefer a vegetarian alternative like agar-agar. Agar-agar requires different quantities and preparation, as it activates with boiling water. If using agar, follow specific instructions on the package to ensure the mousse sets properly.
Elevating Flavor with Variations
For a twist on traditional blackberry mousse, consider incorporating flavors like lemon zest or amaretto into the cream. These add complexity and freshness, enhancing the dessert's overall profile while staying true to its essence.
FAQs
What should I do if the mousse is too thick?
If the mousse sets up too thick, consider adjusting the gelatin amount next time. You can also gently fold in a bit more whipped cream to lighten the texture.
Can I use frozen blackberries for this recipe?
Yes, frozen blackberries can be used, but ensure they are thawed and drained well to prevent excess moisture in the mousse.
Why is my mousse not setting properly?
Improper gelatin activation is often the culprit. Ensure you properly dissolve the gelatin and incorporate it into the mousse mixture before refrigerating.
Can I make this dessert in advance?
Yes, these Mini Blackberry Mousse Cakes can be prepared a day ahead. Just ensure they are covered well in the fridge to maintain freshness.
What if my blackberry puree is too tart?
If the puree is overly tart, adding a bit more sugar during the mixing process can help balance the flavors without compromising the overall taste.
How can I scale the recipe for larger servings?
To scale the recipe, simply multiply all the ingredient quantities by the desired factor while maintaining the same process.
Conclusion
These Mini Blackberry Mousse Cakes are not only a treat for the eyes but also a delightful experience for the palate. Their light and creamy texture, complemented by the vibrant flavor of blackberries, is sure to impress anyone who has the pleasure of tasting them.
With a bit of time and care, creating these charming desserts can become a cherished part of your culinary repertoire. Enjoy the joy and satisfaction of making something truly special!
Recipe Card
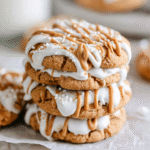
Heavenly Fluffernutter Cookies with Peanut Butter
Ingredients
- 1 cup unsalted butter softened
- 1 cup granulated sugar
- 1 cup packed brown sugar
- 2 large eggs
- 1 teaspoon vanilla extract
- 1 cup creamy peanut butter
- 2 cups all-purpose flour
- 1 teaspoon baking soda
- 1/2 teaspoon salt
- 1 cup marshmallow fluff
Instructions
- Preheat the oven to 350°F (175°C).
- In a large bowl, cream together the softened butter, granulated sugar, and brown sugar until light and fluffy.
- Add in the eggs and vanilla extract, mixing until well combined.
- In a separate bowl, whisk together the flour, baking soda, and salt.
- Gradually add the dry mixture to the wet ingredients, mixing until just combined.
- Fold in the creamy peanut butter until the dough is fully incorporated.
- Scoop tablespoon-sized amounts of dough onto a lined baking sheet, spacing them about 2 inches apart.
- Make a small indentation in the center of each dough scoop and fill each with marshmallow fluff.
- Bake for 10-12 minutes, or until the edges are lightly golden.
- Let the cookies cool on the baking sheet for a few minutes before transferring them to a wire rack.
Notes
Additional serving suggestions: pair with a crisp salad, garlic bread, or roasted seasonal vegetables for balance.
For make-ahead, prep components separately and assemble just before heating to preserve texture.
Taste and adjust with acid (lemon/vinegar) and salt right at the end to wake up flavors.


