Introduction
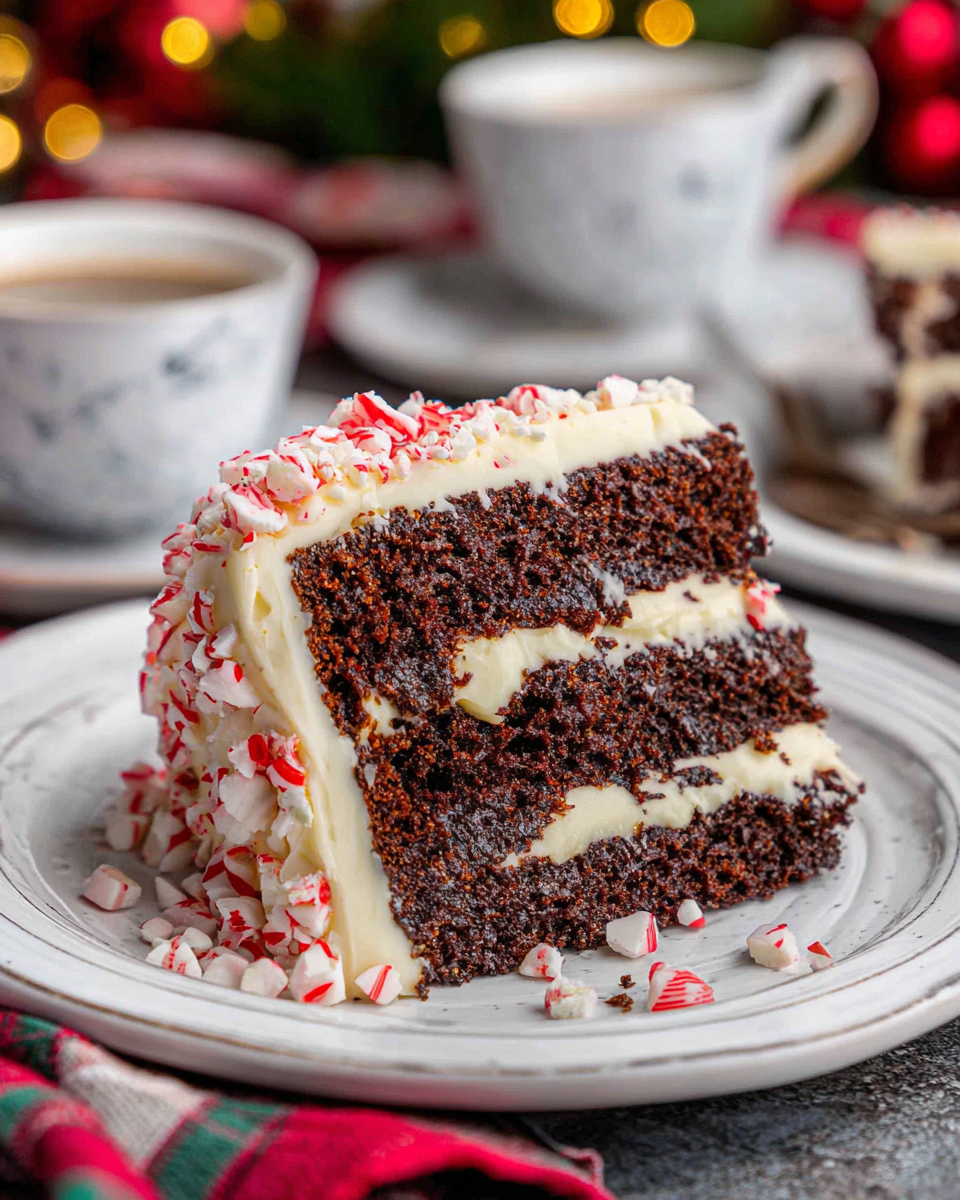
As the holiday season approaches, few desserts capture the essence of festive spirit quite like a Peppermint Mocha Cake. This delightful creation beautifully marries rich chocolate and coffee flavors with a refreshing touch of peppermint, making it perfect for celebrations or cozy gatherings.
Inspired by the comforting vibe of In Bloom Bakery, this cake's layers promise a delightful experience, appealing to both chocolate lovers and peppermint enthusiasts alike. Whether you're preparing for a holiday party or simply indulging in a sweet treat, this cake is sure to impress.
Ingredients
- 2 cups all-purpose flour
All-purpose flour is the backbone of this cake, providing structure and a fluffy texture. Its gluten content allows the cake to rise while maintaining a tender crumb. - 1 ½ cups granulated sugar
Sugar not only adds sweetness but also helps in browning the cake, creating a pleasing exterior. It contributes to moisture retention, ensuring the cake remains soft for days. - 3/4 cup unsweetened cocoa powder
Cocoa powder imparts the rich chocolate flavor that defines this cake. It also contributes to the cake's dark color and moisture, enhancing the overall experience. - 1 teaspoon baking powder
Baking powder acts as a leavening agent, helping the cake to rise and achieve a light, airy texture. It’s essential for creating that perfect crumb. - 1 teaspoon baking soda
This ingredient enhances the leavening process, working alongside baking powder to create a perfectly risen cake. It also balances out the acidity of the cocoa powder. - 1 teaspoon salt
Salt brings out the sweetness in the cake and enhances all the flavors. It’s a key component that ensures a well-balanced taste. - 2 large eggs
Eggs provide moisture and structure to the cake. They help anchor the ingredients together and contribute to the cake's richness and flavor. - 1 cup buttermilk
Buttermilk adds acidity which helps to tenderize the gluten in the flour, resulting in a fluffier cake. It also contributes a slight tanginess that enhances the chocolate flavor. - 1/2 cup brewed coffee
The brewed coffee not only intensifies the chocolate flavor but also adds depth and richness to the cake. It’s a crucial element for a true mocha experience. - 1/2 cup vegetable oil
Oil keeps the cake moist and tender, providing that desired melt-in-your-mouth texture. It also helps in ensuring the cake does not dry out. - 1 teaspoon peppermint extract
This extract delivers a burst of refreshing peppermint flavor, transforming the cake into a festive treat. A little goes a long way in giving it that holiday spirit. - 2 cups powdered sugar
Powdered sugar is used for the frosting, giving it a smooth texture. It sweetens the frosting while ensuring it is easy to spread and aesthetically pleasing. - 1/2 cup unsweetened cocoa powder (for frosting)
Incorporating cocoa powder into the frosting means every layer of this cake is infused with rich chocolate flavor, making each bite decadent. - 4 tablespoons unsalted butter, softened
Butter adds richness and creaminess to the frosting. It acts as a base to hold the powdered sugar and cocoa together, creating a smooth spread. - 6 tablespoons heavy cream
Heavy cream is pivotal for achieving a luscious, velvety frosting. It enhances the texture and adds a rich mouthfeel. - 1/2 teaspoon peppermint extract (for frosting)
Adding more peppermint extract to the frosting enhances its flavor profile, ensuring every element of the cake celebrates the holiday spirit.
Directions & Preparation
Step 1: Preheat the oven to 350°F (175°C) and prepare baking pans.
Setting the oven to the correct temperature at the start ensures even baking. Preparing your pans with grease or parchment paper prevents sticking, making it easier to remove your cakes once baked.
Step 2: In a large mixing bowl, combine the dry ingredients: flour, sugar, cocoa powder, baking powder, baking soda, and salt.
Mixing dry ingredients together ensures even distribution of leavening agents and flavors, which is crucial for a uniform cake structure. Whisk thoroughly to break up any lumps, especially in the cocoa powder.
Step 3: In a separate bowl, whisk together the eggs, buttermilk, coffee, and vegetable oil until well combined.
Combining the wet ingredients separately allows for a smooth blend that won't clump when added to the dry mixture. It prepares the proper texture for better incorporation.
Step 4: Gradually add the wet ingredients to the dry mixture, stirring gently to combine without overmixing.
Overmixing can develop gluten, leading to a dense cake. Gentle folding ensures a light texture while still allowing everything to come together smoothly.
Step 5: Incorporate peppermint extract, mixing until just combined.
Adding peppermint extract at the end allows its flavor to remain potent and prevents it from dissipating during mixing. It enhances the overall taste, making each bite refreshing.
Step 6: Divide the batter evenly between prepared cake pans.
Evenly distributing the batter contributes to uniform baking, ensuring that both layers rise at the same rate. This is vital for stacking and frosting later.
Step 7: Bake for 25-30 minutes or until a toothpick inserted in the center comes out clean.
Keeping an eye on the baking time is essential; this helps prevent overbaking, which can lead to a dry cake. The toothpick test is a reliable method to check for doneness.
Step 8: Allow the cakes to cool in the pans for about 10 minutes before transferring them to a wire rack.
Cooling in the pans briefly helps to set the crumb and makes it easier to remove without breaking. Transferring to a wire rack allows the cakes to cool completely without becoming soggy.
Step 9: While the cakes cool, prepare the frosting by beating together cocoa powder, powdered sugar, butter, and cream until smooth.
Combining these ingredients creates a creamy frosting that can be spread easily. Adjusting the consistency with cream allows for smoother application and better texture.
Step 10: Add peppermint extract to the frosting and mix until incorporated.
Finishing the frosting with peppermint extract reinforces the holiday flavors that make the cake special. It ensures that each layer has a deliciously cohesive taste.
Step 11: Once cakes are cool, frost the top of one layer, place the second layer on top, and frost the top and sides.
Layering the frosting between cake layers adds richness and flavor while building a stable, impressive cake. Frosting the sides creates that beautiful, finished look, ready for presentation.
Step 12: Decorate with chocolate shavings or crushed peppermint if desired.
Decoration adds visual appeal and enhances the experience. Chocolate shavings and crushed peppermint spark festive cheer and provide additional texture and flavor contrast.

The Origin of Peppermint Mocha Flavor
The combination of peppermint and mocha is not merely a seasonal trend; it draws deeply from the rich history of coffee culture. The stimulating aroma of coffee, when intertwined with the invigorating scent of peppermint, creates a sensory delight. This pair has become synonymous with winter festivities, offering comfort and warmth in every decadent bite. The explosion of flavor is emblematic of cozy gatherings and joyous celebrations.
Tips for Layering Your Cake
Layering a cake can often feel daunting, but with a few tips, you’ll achieve a professional-looking dessert. Ensure your layers are even, and don’t rush the frosting process. Allow each layer to cool completely for a smoother finish. When frosting, apply a thin layer first to trap crumbs, then add a final layer for that perfect finish. Additionally, using a spatula or a bench scraper can help achieve those clean and smooth edges that elevate the presentation.
Creative Variations to Explore
While the classic peppermint mocha flavors are delightful, there’s room to experiment with this cake. Consider adding a layer of chocolate ganache for added richness between the cake layers, or swirl in peppermint chips for a further burst of flavor. Baking a mini version or cupcakes can also offer delightful single-servings. Adjusting the flavors by incorporating espresso instead of brewed coffee can also intensify that mocha profile for coffee lovers.
FAQs
What if my cake layers seem too dense?
If your cake layers are dense, it may be due to overmixing the batter. Ensure you mix only until just combined to maintain a light texture.
Can I adjust the amount of peppermint extract used?
Absolutely! You can modify the peppermint extract quantity based on your preference. Start with less if you're unsure, tasting as you go.
What should I do if my frosting turns out too thick?
If your frosting is too thick, add a tablespoon of heavy cream at a time, mixing until you reach your desired consistency. This will help achieve a smooth spread.
Can I use another type of chocolate in this recipe?
Yes, you can experiment with different types of chocolate. Dark chocolate can add richness, while white chocolate can bring sweetness to balance the flavors.
What if my cakes aren’t rising properly?
If your cakes are not rising, check that your baking powder and baking soda are fresh. Old leavening agents can lose effectiveness.
Is it necessary to let the cake cool completely before frosting?
Yes, allowing the cake to cool completely helps prevent melting the frosting. This also ensures a clean, well-layered appearance when you frost the cake.
Conclusion
Making a Peppermint Mocha Cake at home is not just about baking; it's about creating memories that are bound to linger. With its rich flavors and festive appearance, this cake is bound to become a tradition in your holiday repertoire.
Share it with friends and family, watch their faces light up with delight, and enjoy the satisfying feeling of bringing joy through your baking. Whether you keep it classic or put your personal spin on it, this cake promises to warm hearts and homes alike.
Recipe Card

Elevate Your Lunch with a Chicken Caesar Salad Wrap
Ingredients
- 2 cups cooked chicken shredded
- 4 large romaine lettuce leaves
- ½ cup cherry tomatoes halved
- ¼ cup Parmesan cheese shredded
- ½ cup Caesar dressing
- 4 whole wheat wraps
- Salt and black pepper to taste
Instructions
- Prepare the chicken and vegetables.
- Mix chicken with dressing.
- Add vegetables and cheese to the mixture.
- Assemble the wrap.
- Slice and enjoy!
Notes
Additional serving suggestions: pair with a crisp salad, garlic bread, or roasted seasonal vegetables for balance.
For make-ahead, prep components separately and assemble just before heating to preserve texture.
Taste and adjust with acid (lemon/vinegar) and salt right at the end to wake up flavors.


