Introduction
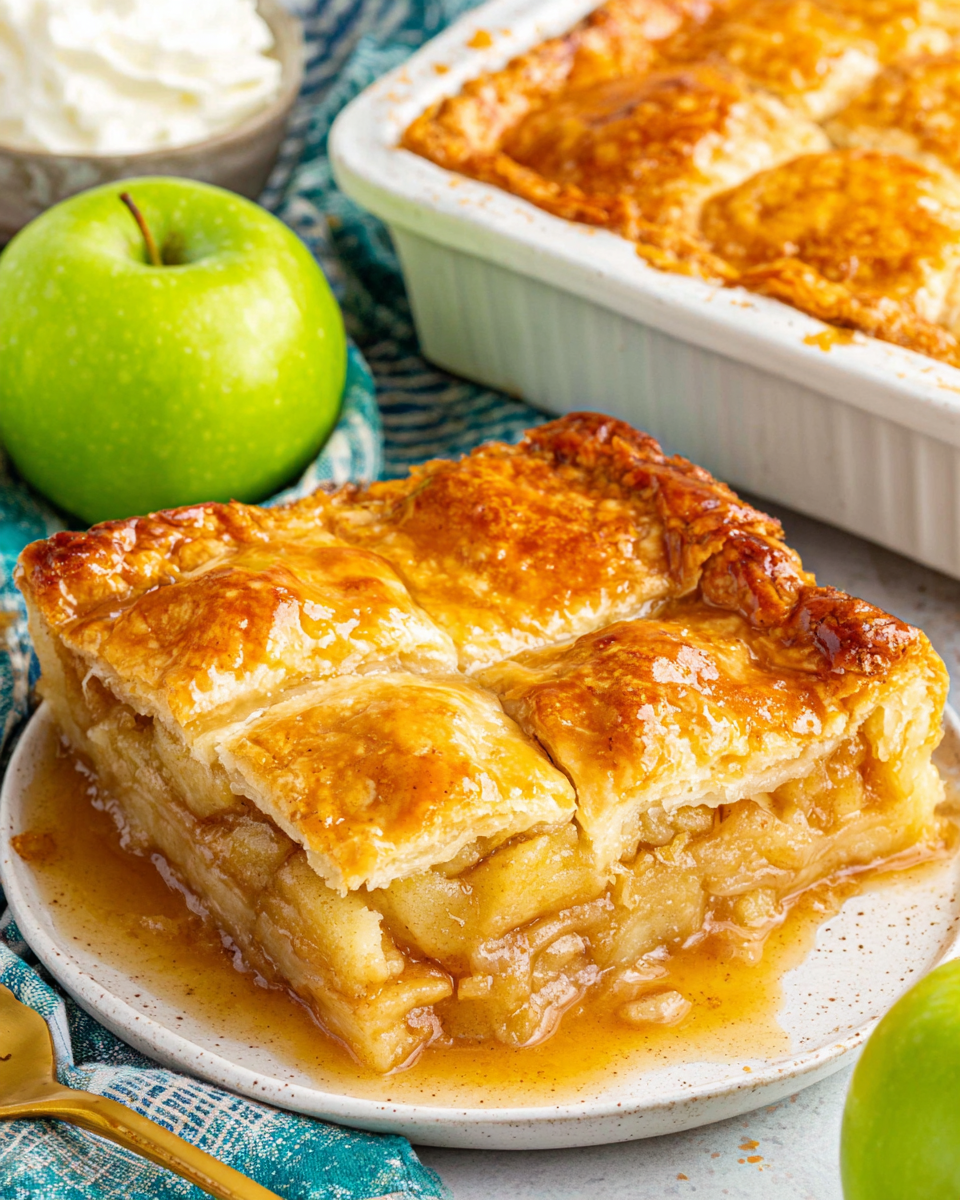
Apple slab pie is an irresistible treat that blends the flavors of sweet apples and buttery crust into a communal dessert. Unlike traditional pie, this version spreads the filling across a larger surface, making it perfect for family gatherings or celebrations.
The beauty of apple slab pie lies not only in its simplicity but also in its ability to showcase a variety of apple types, each adding its unique flavor and texture to the filling. As the pie bakes, the aroma of cinnamon and caramelized apples fills the kitchen, inviting everyone to gather around for a slice.
This pie is both a nostalgic nod to classic desserts and a practical choice, as it slices easily and is perfect for sharing. Let’s dive into making this delightful dessert that will have friends and family asking for seconds.
Ingredients
- 4 cups diced apples
Choosing a mix of tart and sweet apples, such as Granny Smith and Honeycrisp, enhances the flavor profile of the pie. Their different textures help create a more complex filling. - 1 cup granulated sugar
Sugar not only sweetens the filling but also helps to draw moisture from the apples, creating a syrupy consistency that binds the filling together. - 2 tablespoons cornstarch
Cornstarch is crucial for thickening the apple filling, ensuring it doesn’t become runny during baking, which can lead to a soggy crust. - 1 teaspoon ground cinnamon
Cinnamon adds a warm, comforting flavor that complements the apples beautifully, making the pie taste like a hug in dessert form. - 1 teaspoon vanilla extract
Vanilla enhances the overall flavors, providing a background note that elevates the apple and spice profile. - 1/2 teaspoon salt
Salt balances the sweetness of the pie and brings out the inherent flavors of the apples, making them more vibrant. - 1 cup unsalted butter (2 sticks)
Butter is essential for creating a flaky, rich crust while providing a delicious flavor that pairs perfectly with the sweet filling. - 2 1/2 cups all-purpose flour
Flour forms the structure of the crust; using the right balance with fat allows it to be both tender and sturdy for holding the apple filling. - 1/4 cup cold water
Cold water helps bind the crust ingredients together while keeping the butter cold, ensuring a flaky texture. - 1 egg (for egg wash)
The egg wash gives the crust a golden color as it bakes and adds a subtle sheen that enhances the pie's presentation.
Directions & Preparation
Step 1: Prepare the crust by combining flour and salt in a bowl.
This step lays the foundation of the pie. Ensure the flour is well-combined with salt to evenly distribute the flavor and enhance the crust. Using cold ingredients keeps the butter from melting too quickly, which is essential for a flaky texture.
Step 2: Cut in the butter until the mixture resembles coarse crumbs.
Cutting in the butter properly creates pockets of fat that, when baked, will turn into steam, causing the layers to puff and flake. Aim for pea-sized chunks in the mixture for optimal texture.
Step 3: Gradually add cold water while mixing until the dough comes together.
Do not overwork the dough; just mix until combined. Adding too much water or overmixing can lead to a tough crust. You want a slightly sticky but manageable dough.
Step 4: Divide the dough in two, shape it into disks, wrap, and refrigerate for at least an hour.
Chilling the dough allows the gluten to relax, making it easier to roll out later. It also ensures the butter remains cold, contributing to a flakier crust.
Step 5: Preheat your oven to 375°F (190°C).
Preheating ensures that the pie begins baking immediately, allowing the crust to set properly and the apples to caramelize without becoming mushy.
Step 6: Roll out one disk for the bottom crust and place it in your baking sheet.
Rolling the dough evenly is key to a beautifully baked crust. A well-fitted bottom crust prevents the filling from leaking and supports the overall structure of the pie.
Step 7: In a mixing bowl, combine the diced apples, sugar, cornstarch, cinnamon, vanilla, and salt.
Mixing these ingredients evenly helps ensure that each piece of apple is coated and flavored, allowing for a uniform taste throughout. The cornstarch will help thicken the juices released as the apples bake.
Step 8: Pour the apple mixture into the prepared crust.
Spread the apple mixture evenly, ensuring coverage to avoid gaps where the filling would leak out. It also helps with even cooking during baking.
Step 9: Roll out the second disk of dough for the top crust and place it over the filling.
The top crust can be left whole or cut into strips for a lattice design. A well-ventilated top allows steam to escape, preventing sogginess and ensuring the filling is just the right texture.
Step 10: Seal the edges and make slits in the top crust if not using a lattice.
Sealing the edges prevents the filling from bubbling over and ensures a tidy presentation. The slits allow steam to escape, ensuring a perfectly cooked pie.
Step 11: Brush the top crust with beaten egg for a golden finish.
The egg wash imparts an appealing shine and color. It’s essential for visual appeal, making the pie look as delicious as it tastes.
Step 12: Bake for 45-50 minutes or until the apples are tender and the crust is golden brown.
Keep an eye on the pie while baking; the sugar can cause it to brown quickly. Covering with foil can help if it browns too fast. The filling should bubble slightly, indicating that it’s fully cooked.
Step 13: Allow the pie to cool before slicing.
Cooling allows the filling to set, making for cleaner slices. Cutting too soon can result in a runny filling, so patience here is key.

Choosing the Right Apples for Flavor and Texture
When crafting your apple slab pie, selecting the right mix of apples can elevate the flavor significantly. Tangy varieties like Granny Smith provide a necessary tartness that balances out the sweetness of honeycrisp or Fuji apples. Combining different textures also contributes to a more satisfying bite, with juicy, firm apples holding their shape while baking.
The Art of Crust: Butter vs. Shortening
Many home bakers ponder over the choice between butter and shortening for their pie crusts. While butter yields a richer flavor and browns beautifully, shortening can offer a more tender and flaky texture. For those seeking the best of both worlds, a blend of the two offers a delectable compromise that enhances both flavor and flakiness in your slab pie crust.
Serving Suggestions for Your Slab Pie
Apple slab pie shines on its own, but pairing it with accompaniments can take it to the next level. Consider serving it warm with a scoop of vanilla ice cream or a dollop of fresh whipped cream to balance the sweetness. For a more sophisticated touch, a drizzle of caramel sauce or a sprinkle of sea salt adds depth and enhances the overall dessert experience.
FAQs
What can I do if my apple filling turns out too watery?
If your apple filling is watery, it’s likely due to overripe apples or not using enough cornstarch. Next time, choose firmer apples and ensure you measure the cornstarch accurately.
Can I use only one type of apple for the filling?
Yes, you can use only one type of apple, but a mix will provide a more complex flavor and texture. If you prefer a single variety, opt for something that balances sweetness and tartness.
What should I do if my dough is too crumbly?
If your dough is too crumbly, it's likely not hydrated enough. Gradually add small amounts of cold water while mixing until it holds together without becoming wet.
How can I make my slab pie more visually appealing?
For a visually appealing slab pie, consider creating a lattice topping or cutting decorative shapes out of the dough. Egg wash on the crust also adds a nice sheen.
What if my slab pie crust is too thick?
If your crust is too thick, you can roll it out thinner next time, or, if baked already, try to cut it into smaller servings to balance the crust-to-filling ratio.
Can I scale this recipe for a larger crowd?
Absolutely! Simply double the ingredient quantities and use a larger baking sheet. Keep an eye on the baking time; larger quantities may require a few extra minutes.
Conclusion
Apple slab pie is more than just a dessert; it’s an experience that invites sharing and brings comfort. The fragrance of cinnamon and apples wafting through the house adds a warmth that only homemade desserts can provide.
Whether you’re perfecting your baking skills or creating a family tradition, this pie is sure to become a favorite. So, roll up your sleeves, gather your ingredients, and get ready to delight in a slice of nostalgia.
Recipe Card
Delightful Apple Slab Pie for Home Bakers
Ingredients
- 4 cups diced apples
- 1 cup granulated sugar
- 2 tablespoons cornstarch
- 1 teaspoon ground cinnamon
- 1 teaspoon vanilla extract
- 1/2 teaspoon salt
- 1 cup unsalted butter 2 sticks
- 2 1/2 cups all-purpose flour
- 1/4 cup cold water
- 1 egg for egg wash
Instructions
- Prepare the crust by combining flour and salt in a bowl.
- Cut in the butter until the mixture resembles coarse crumbs.
- Gradually add cold water while mixing until the dough comes together.
- Divide the dough in two, shape it into disks, wrap, and refrigerate for at least an hour.
- Preheat your oven to 375°F (190°C).
- Roll out one disk for the bottom crust and place it in your baking sheet.
- In a mixing bowl, combine the diced apples, sugar, cornstarch, cinnamon, vanilla, and salt.
- Pour the apple mixture into the prepared crust.
- Roll out the second disk of dough for the top crust and place it over the filling.
- Seal the edges and make slits in the top crust if not using a lattice.
- Brush the top crust with beaten egg for a golden finish.
- Bake for 45-50 minutes or until the apples are tender and the crust is golden brown.
- Allow the pie to cool before slicing.
Notes
Additional serving suggestions: pair with a crisp salad, garlic bread, or roasted seasonal vegetables for balance.
For make-ahead, prep components separately and assemble just before heating to preserve texture.
Taste and adjust with acid (lemon/vinegar) and salt right at the end to wake up flavors.


