Introduction
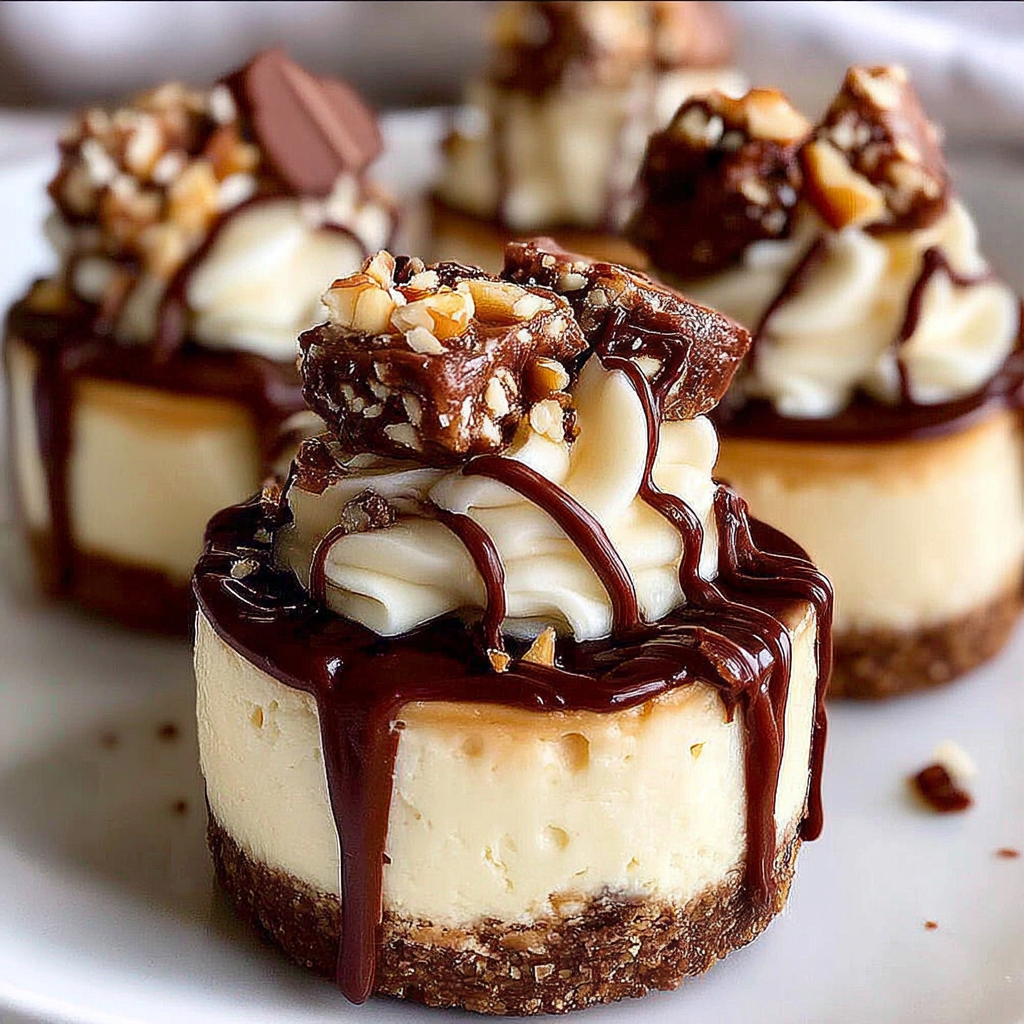
If you're a cheesecake lover looking for a delightful twist, these Mini Rolo Cheesecakes are sure to impress. Combining the creamy texture of traditional cheesecake with the rich, chocolate-caramel experience of Rolo candies, they create a bite-sized dessert that satisfies every sweet tooth. Perfect for parties or a cozy night in, these mini delights deliver both flavor and charm.
Making cheesecakes can often feel intimidating, but these mini versions simplify the process while offering an elegant presentation. With a buttery graham cracker crust and a luscious chocolate-caramel center, these cheesecakes are an inviting treat that’s as enjoyable to make as they are to eat. Let’s dive into the ingredients and get those baking tools ready!
Ingredients
- 1 ½ cups graham cracker crumbs
Forming a crunchy base, graham cracker crumbs bring texture and a hint of sweetness to the cheesecake. They provide the necessary structure that holds the mini cheesecakes together. - ⅓ cup unsalted butter, melted
Melted butter binds the graham cracker crumbs, adding richness and flavor to the crust. It ensures that the crust will hold its shape once baked and chilled. - 2 (8 oz) packages cream cheese, softened
Cream cheese is the star ingredient in cheesecakes, providing a smooth and creamy texture. It also creates the tangy flavor profile that balances the sweetness of the added sugars. - ⅓ cup granulated sugar
This sugar sweetens the cheesecake filling, enhancing the overall flavor without overpowering the other ingredients. It also helps achieve a silky texture when whipped with the cream cheese. - 1 teaspoon vanilla extract
Vanilla extract elevates the flavor of the cheesecake, adding depth and a warmth that complements the sweetness of the Rolo candies. - 2 large eggs
Eggs are essential for setting the structure of the cheesecake. They add richness and creaminess while helping the filling to firm up during baking. - 12 Rolo candies, chopped
Chopped Rolos add a delightful surprise of chocolate and caramel in every bite. They melt slightly during baking, creating bursts of flavor that enhance the cheesecake's richness. - Whipped cream for garnish (optional)
Whipped cream adds a light, airy touch to the dessert, balancing the rich flavors of the cheesecake. It also serves as a beautiful garnish that enhances presentation.
Directions & Preparation
Step 1: Preheat the oven to 325°F (160°C).
Preheating the oven is crucial for ensuring that the cheesecakes bake evenly. An adequately heated oven allows for proper cooking of the filling and helps achieve a smooth texture. Make sure your oven reaches the set temperature before placing the mini cheesecakes inside.
Step 2: In a bowl, combine the graham cracker crumbs and melted butter until well mixed.
This step binds the crumbs with the butter, making a moist mixture that can be easily pressed into the muffin tin. It’s important to achieve a consistency where the crumbs hold together, ensuring a solid crust once baked.
Step 3: Divide the mixture into a 12-cup muffin tin, pressing firmly into the bottoms to form a crust.
Pressing the crumb mixture firmly is essential to create a sturdy base that can hold the weights of the filling. Use a flat-bottomed glass or your fingers to ensure even distribution across the base of each cup.
Step 4: Bake the crusts in the preheated oven for 8-10 minutes, until lightly golden.
Baking the crusts enhances their flavor and texture, making them crisp and preventing them from becoming soggy when the cheesecake filling is added. Keep an eye on them to avoid over-baking; a golden color indicates readiness.
Step 5: While the crusts cool, beat the softened cream cheese and sugar together until smooth.
In this step, achieving a smooth batter is key for a creamy texture in the final cheesecake. Properly softened cream cheese will mix seamlessly with the sugar without lumps, ensuring a velvety filling.
Step 6: Add in the eggs, one at a time, and mix until fully combined, then stir in the vanilla extract.
Adding eggs individually allows for better incorporation and helps maintain a smooth consistency. Be careful not to overmix at this stage; over-aerating can lead to cracks in the cheesecakes as they bake.
Step 7: Gently fold in the chopped Rolo candies into the cheesecake mixture.
Folding in the Rolos carefully avoids breaking them up too much, keeping delightful chunks that will melt to create pockets of chocolate and caramel. This step adds sweetness and rich flavors throughout the filling.
Step 8: Pour the cheesecake filling over the cooled crusts, filling each cup to about ¾ full.
Filling the cups to ¾ full ensures that the mini cheesecakes have enough room to rise slightly during baking without overflowing. Smooth the tops for an even finish, which also helps with presentation.
Step 9: Bake the cheesecakes for 15-18 minutes, or until the edges are set but the center still jiggles slightly.
Baking until just set helps ensure the cheesecakes remain creamy and do not turn rubbery. The slight jiggle in the center indicates that the filling will firm up as they cool.
Step 10: Remove the cheesecakes from the oven and let them cool completely in the tin before transferring to the refrigerator.
Cooling them in the tin prevents them from collapsing and helps maintain their shape. Once they're at room temperature, chilling them enhances the flavors and textures, making them easier to serve later.
Step 11: Chill the cheesecakes for at least 2 hours before serving, then top with whipped cream if desired.
Chilling the cheesecakes allows the flavors to meld and the structure to firm up, creating the perfect texture upon serving. The option to add whipped cream adds an appealing touch and balances the rich flavors of the cheesecake.

Flavor Pairing with Rolos: A Unique Delight
Rolos bring a distinctive flavor profile that combines chocolate and caramel. To enhance this duo, consider adding a sprinkle of sea salt on top of the whipped cream or the cheesecakes themselves. This savory touch can elevate the sweetness into a delightful contrast, making every bite a more complex experience.
Going Mini: The Appeal of Bite-Sized Treats
Mini desserts have gained popularity for good reason. They offer portion control while allowing for the enjoyment of delicious flavors. Perfect for gatherings, these Mini Rolo Cheesecakes can be part of a dessert table or enjoyed as a simple indulgence at home—satisfying cravings without overwhelming the palate.
Customizing Your Cheesecake Experience
Feel free to get creative with your Mini Rolo Cheesecakes! Add a layer of caramel sauce on top or swirl some into the cream cheese mixture for an even richer experience. You can also experiment with different mix-ins like nuts or other candy bars, adapting the recipe to fit your tastes and preferences.
FAQs
What should I do if my cheesecakes puff up too much during baking?
If your cheesecakes puff up excessively, it often means they were overmixed. To prevent this, mix just until combined during the egg addition.
Can I use other types of candies in this cheesecake?
Absolutely! Feel free to use your favorite candy, like Snickers or Twix, as a substitute for Rolos to create delicious variations.
What if my crust crumbled when I tried to remove the cheesecakes?
If the crust crumbles, it may not have been compacted tightly enough. Next time, ensure you press it firmly into the muffin tin before baking.
How can I make these cheesecakes less sweet?
To decrease sweetness, try reducing the amount of sugar in the cheesecake filling slightly or using unsweetened whipped cream on top.
Can I double this recipe to make more cheesecakes?
Yes, simply double the ingredients, and ensure you have enough muffin tins for all the batter. Bake them in batches if necessary.
What should I do if my cream cheese mixture is lumpy?
If you find your mixture lumpy, ensure your cream cheese is adequately softened. You might also consider blending it longer to achieve a smoother consistency.
Conclusion
These Mini Rolo Cheesecakes are not just visually appealing; they embody the perfect blend of flavors and textures, making them a worthy addition to any dessert repertoire. Experimenting with different flavors and toppings can turn this basic recipe into a family favorite that's frequently requested.
As you bake these delightful treats, remember that the joy of cooking lies in creativity and experimentation. So, roll up your sleeves, channel your inner pastry chef, and savor every moment of the sweet journey with your Mini Rolo Cheesecakes!
Recipe Card

Vegan Mushroom Chestnut Wellington Recipe for Home Cooks
Ingredients
- 1 sheet of vegan puff pastry thawed
- 500 g mixed mushrooms like cremini, shiitake, and button
- 200 g cooked chestnuts chopped
- 1 medium onion finely chopped
- 2 cloves garlic minced
- 1 tablespoon fresh thyme or 1 teaspoon dried
- 1 tablespoon soy sauce or tamari
- 1 tablespoon nutritional yeast
- Salt and pepper to taste
- Olive oil for cooking
- 1 plant-based egg wash for brushing
Instructions
- Preheat your oven to 200°C (400°F).
- In a large skillet, heat olive oil over medium heat.
- Add the chopped onion and garlic; sauté until translucent.
- Stir in the mixed mushrooms and cook until they release their moisture and are golden brown.
- Add the cooked chestnuts, thyme, soy sauce, nutritional yeast, salt, and pepper; mix well and cook for an additional 2-3 minutes.
- Remove from heat and let the filling cool slightly.
- Roll out the puff pastry on a lightly floured surface to fit your baking tray.
- Place the mushroom and chestnut filling in the center of the pastry, shaping it into a log.
- Fold the pastry over the filling, sealing the edges well.
- Place the Wellington on a baking sheet lined with parchment paper.
- Brush the pastry with plant-based egg wash for a golden finish.
- Bake for 25-30 minutes or until golden brown and puffed up.
- Remove from the oven and let the Wellington rest for 5-10 minutes before slicing.
Notes
Additional serving suggestions: pair with a crisp salad, garlic bread, or roasted seasonal vegetables for balance.
For make-ahead, prep components separately and assemble just before heating to preserve texture.
Taste and adjust with acid (lemon/vinegar) and salt right at the end to wake up flavors.


