Introduction
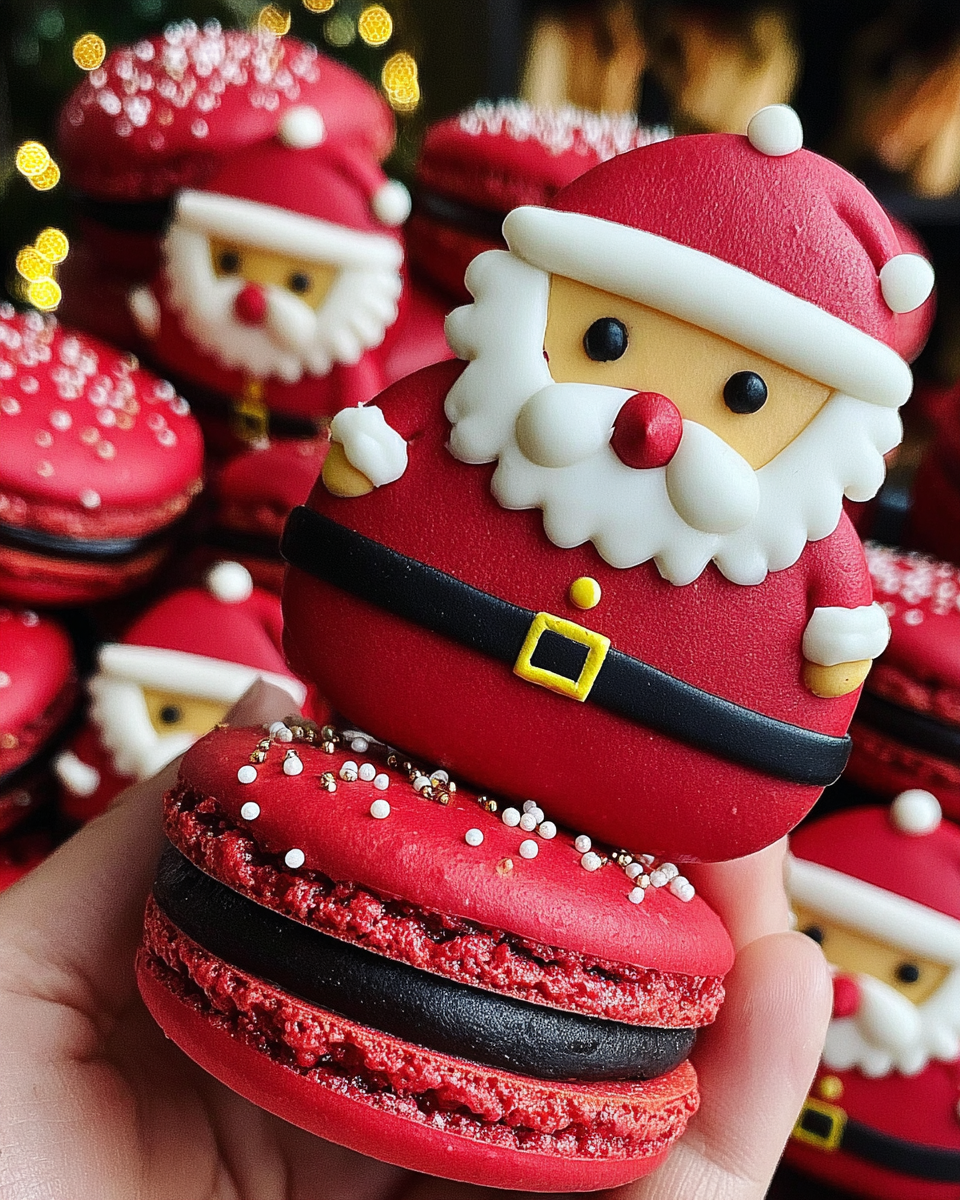
During the festive season, few treats capture the spirit of Christmas quite like Santa Claus macarons. These delightful French confections, with their crisp shells and luscious fillings, can bring joy to any holiday gathering.
The festive red and white colors can infuse your kitchen with cheer, while the playful design makes them an ideal baking project to sprinkle some fun into your holiday festivities. Whether you're an experienced baker or a novice, these macarons are a wonderful way to impress family and friends.
Ingredients
- 115g almond flour
Almond flour is key for making the macaron shells light and chewy. Its fine texture helps create that delicate crispiness while adding a subtle nutty flavor that complements the sweetness. - 200g powdered sugar
Powdered sugar provides the necessary sweetness and helps achieve a smooth batter. Its fine granules ensure that the macaron shells have a silky finish when baked. - 100g egg whites (aged)
Using aged egg whites helps stabilize the meringue, which is critical for achieving the desired rise and texture in your macarons. As they age, egg whites lose moisture, creating a more robust meringue. - 50g granulated sugar
Granulated sugar is gradually added to the whipped egg whites to help stabilize them and create a macaronage that holds its shape without becoming too dry or too runny. - Red food coloring
Food coloring is optional, but it is essential for giving your macarons the festive red hue. Gel or paste formats provide vibrant color without adding too much liquid. - Butter (for filling)
Butter is the primary component for buttercream filling, contributing richness and a velvety mouthfeel. It acts as the base to which other flavorings are added. - Powdered sugar (for filling)
More powdered sugar is needed for the buttercream filling, providing sweetness and a creamy texture. Proper blending ensures that it achieves the perfect consistency. - Vanilla extract (for filling)
Vanilla extract enhances the flavor profile of the filling, adding warmth and depth. It's a staple in many dessert recipes, complementing the sweetness beautifully.
Directions & Preparation
Step 1: Prepare the macaron batter by mixing dry ingredients.
Begin by sifting the almond flour and powdered sugar together. This step is crucial as it breaks down any lumps and ensures a uniform mixture, which helps create smooth macaron shells. Sifting also aerates the dry ingredients, enhancing their texture.
Step 2: Whip egg whites to stiff peaks with granulated sugar.
In a clean bowl, whip the aged egg whites until frothy, gradually adding the granulated sugar until stiff peaks form. This is the meringue stage, vital for achieving the right structure in macarons. It’s important that your mixing bowl is free from any grease to ensure proper whipping.
Step 3: Incorporate dry ingredients into the meringue.
Gently fold the sifted almond flour and powdered sugar into the meringue. This macaronage technique is essential; overmixing can lead to flat shells, while undermixing can result in unformed shapes. Aim for a smooth batter that cascades from your spatula.
Step 4: Color the batter with food coloring.
After your batter is well mixed, add a few drops of red food coloring. Mix just until the color is evenly distributed, which should create a beautiful red hue. Be careful as too much mixing can affect the batter's consistency.
Step 5: Pipe the macaron shells onto baking sheets.
Transfer your macaron batter to a piping bag fitted with a round tip. Pipe uniform circles onto a lined baking sheet, making sure to leave space between each one. Tapping the baking sheet gently on the counter helps release any air bubbles trapped in the batter.
Step 6: Let the piped shells rest before baking.
Allow the piped macarons to rest at room temperature for 30 to 60 minutes until a skin forms on their surface. This step is crucial as it helps prevent cracking during baking, resulting in the perfect macaron with a smooth top surface.
Step 7: Bake the macarons at the right temperature.
Preheat your oven to 150°C (300°F) and bake the macarons for 15-20 minutes. Baking at a lower temperature helps avoid browning while allowing the shells to rise. Be sure to check them frequently toward the end of baking.
Step 8: Prepare the buttercream filling while shells cool.
In a mixing bowl, beat the softened butter until creamy. Gradually add in powdered sugar and vanilla, mixing until a smooth buttercream forms. This filling will not only add flavor but also perfectly complement the crunch of your macaron shells.
Step 9: Assemble the macarons once cooled.
Once the macaron shells are completely cool, pair them by size and pipe a dollop of buttercream onto the flat side of one shell. Top it with the matching shell, creating a delightful sandwich. Press gently to secure.
Step 10: Store and serve the finished macarons.
For optimal flavor, let the assembled macarons rest in the fridge for 24 hours before enjoying. This allows the flavors to meld beautifully. Serve at room temperature for the best experience.

Creating the Ideal Macaron Shell
Achieving the perfect macaron shell is a delicate balance of technique and timing. Ensuring your egg whites are properly whipped to the right consistency is paramount, as underwhipped whites will not stabilize the macaron properly. Similarly, the folding technique during the macaronage stage is essential to achieve a smooth batter that holds its shape. Even small variations in mixing can dramatically change the final product.
Festive Fillings for Personalized Flavors
While traditional buttercream makes a lovely filling, feel free to experiment with additional flavors like peppermint, chocolate, or even a tangy raspberry jam for a holiday twist. These various fillings can be piped between your macaron shells to surprise guests with delightful taste combinations. Each uniquely flavored filling can elevate the festive experience and make each bite a little more special.
Serving Suggestions and Presentation Tips
When presenting your Santa Claus macarons, consider serving them on a festive platter or in a decorated gift box for a charming touch. Pair them with seasonal beverages like eggnog or mulled wine to enhance the celebration. Their vibrant colors and playful designs will certainly be a visual treat, easily making them the star of your dessert table during the holiday festivities.
FAQs
What should I do if my macaron shells are cracked?
If your macarons crack during baking, be sure to let your piped batter sit until a skin has formed before baking next time. Over-whipping the meringue can also lead to cracks, so aim for stiff peaks without overdoing it.
How can I tell if my macarons are fully baked?
A well-baked macaron should have a firm shell with a slight sheen and should not feel sticky. Gently touch the top; if it doesn't stick, they are likely done.
Can I use a different filling instead of buttercream?
Absolutely! Feel free to use ganache, jam, or flavored curds to fill your macarons and customize them to your liking.
What if my macaron batter is too runny?
If your batter is too runny, it may be due to under-mixing or too much liquid from egg whites. You can try adding a tad more almond flour, ensuring that all ingredients were measured correctly.
How can I make my macarons smaller or larger?
To adjust the size of your macarons, simply alter the piping size when creating your shell shapes. Keep in mind that baking times will vary slightly based on size.
What if my macarons don't develop feet?
The lack of feet could result from not letting the macarons rest before baking. It’s essential to allow them enough time to form a skin that helps feet develop during baking.
Conclusion
Incorporating Santa Claus macarons into your holiday traditions can create delightful memories and impress your loved ones with your baking skills. Their festive appearance and rich flavors make them perfect for sharing or gifting.
With a bit of practice, these treats can become a staple at your holiday gatherings, bringing joy and a touch of elegance to your celebrations. Remember, baking is about enjoyment, so have fun with the process!
Recipe Card
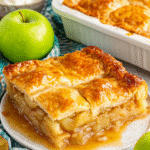
Delightful Apple Slab Pie for Home Bakers
Ingredients
- 4 cups diced apples
- 1 cup granulated sugar
- 2 tablespoons cornstarch
- 1 teaspoon ground cinnamon
- 1 teaspoon vanilla extract
- 1/2 teaspoon salt
- 1 cup unsalted butter 2 sticks
- 2 1/2 cups all-purpose flour
- 1/4 cup cold water
- 1 egg for egg wash
Instructions
- Prepare the crust by combining flour and salt in a bowl.
- Cut in the butter until the mixture resembles coarse crumbs.
- Gradually add cold water while mixing until the dough comes together.
- Divide the dough in two, shape it into disks, wrap, and refrigerate for at least an hour.
- Preheat your oven to 375°F (190°C).
- Roll out one disk for the bottom crust and place it in your baking sheet.
- In a mixing bowl, combine the diced apples, sugar, cornstarch, cinnamon, vanilla, and salt.
- Pour the apple mixture into the prepared crust.
- Roll out the second disk of dough for the top crust and place it over the filling.
- Seal the edges and make slits in the top crust if not using a lattice.
- Brush the top crust with beaten egg for a golden finish.
- Bake for 45-50 minutes or until the apples are tender and the crust is golden brown.
- Allow the pie to cool before slicing.
Notes
Additional serving suggestions: pair with a crisp salad, garlic bread, or roasted seasonal vegetables for balance.
For make-ahead, prep components separately and assemble just before heating to preserve texture.
Taste and adjust with acid (lemon/vinegar) and salt right at the end to wake up flavors.


