Introduction
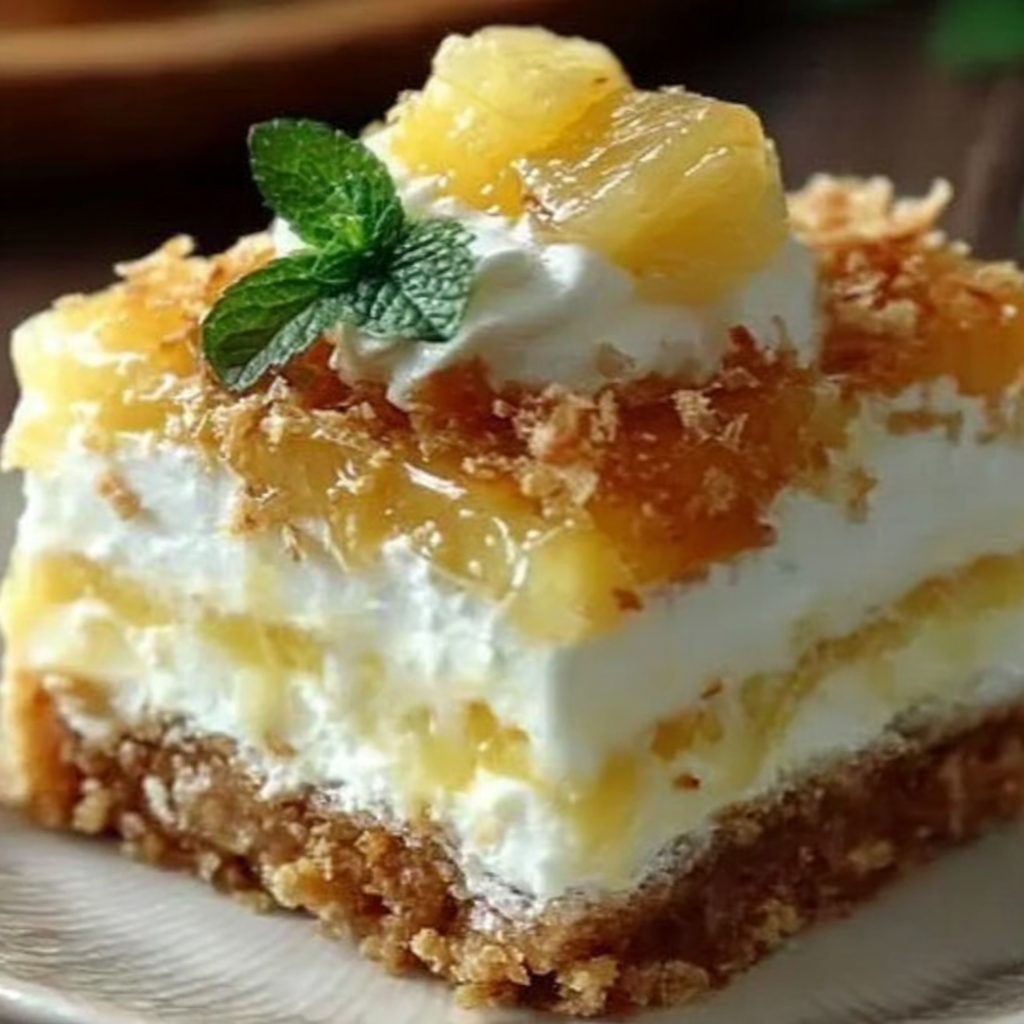
For those warm sunny days when turning on the oven feels like an unnecessary chore, the No Bake Pineapple Dream Dessert is the perfect solution. This refreshing treat combines the sweetness of pineapple with a creamy filling, all set atop a buttery crust, making it an ideal addition to any summer gathering or potluck.
Not only is this dessert a breeze to prepare, but it also impresses with its vibrant flavors and lovely presentation. Each layer of this dessert offers a unique texture and taste, resulting in a delightful experience with every bite. So, grab your ingredients and let’s dive into making this delicious no-bake treat!
Ingredients
- 1 ½ cups crushed graham crackers
Crushed graham crackers form the base of the dessert, providing a crunchy texture that contrasts beautifully with the creamy layers. Their slightly sweet flavor adds a touch of warmth, making the crust the perfect foundation for the pineapple filling. - ½ cup unsalted butter, melted
Melted unsalted butter is essential for binding the crushed graham crackers together. It adds richness to the crust, ensuring that it holds its shape while enhancing the overall flavor of the dessert. - 8 oz cream cheese, softened
Softened cream cheese offers a creamy and tangy component to the dessert. It helps create a luscious filling that beautifully complements the sweetness of the pineapple. - 1 cup powdered sugar
Powdered sugar brings sweetness to the filling without the graininess of granulated sugar. It easily blends with cream cheese, resulting in a smooth and creamy texture that pairs perfectly with the other ingredients. - 1 cup whipped topping
Whipped topping adds lightness and airiness to the filling, transforming it into a fluffy delight. It balances the richness of the cream cheese and ensures the dessert is easy to scoop and serve. - 1 can (20 oz) crushed pineapple, drained
Crushed pineapple introduces a juicy sweetness and a unique tartness, enriching the flavor profile. The moisture from the pineapple helps to keep the dessert refreshing, making it a lovely choice for warmer weather. - ½ cup shredded coconut (optional)
Shredded coconut adds a tropical flair and enhances the texture with a chewy bite. While optional, it offers a complementary flavor that brings out the essence of tropical desserts. - Maraschino cherries (for garnish, optional)
Maraschino cherries serve as a classic decorative touch, adding pops of color to the dessert. They not only beautify the presentation but also contribute a sweet-tart flavor that complements the dish.
Directions & Preparation
Step 1: Prepare the crust.
Begin by combining crushed graham crackers and melted butter in a mixing bowl. This mixture should look like wet sand and hold together when pressed. Press the mixture firmly into the bottom of your chosen dish, ensuring an even layer that will provide structural support to the dessert. Refrigerate the crust for at least 30 minutes to set, which will help it maintain its shape when layered with the filling.
Step 2: Mix the cream cheese filling.
While the crust is chilling, beat the softened cream cheese in a larger bowl until smooth. Gradually add the powdered sugar and mix until well combined and creamy. This step is crucial; ensuring there are no lumps will lend a velvety texture to the filling, making the dessert light and delightful. Adding vanilla extract at this stage is optional but recommended for an extra layer of flavor.
Step 3: Incorporate the whipped topping.
Once the cream cheese and sugar mixture is smooth, gently fold in the whipped topping. Use a spatula to achieve a uniform mixture while being careful not to deflate the airiness of the whipped cream. This will ensure your filling is both rich and fluffy, creating that desired light mouthfeel that contrasts with the crust.
Step 4: Add the crushed pineapple.
Gently fold in the drained crushed pineapple into the cream cheese mixture. This step is essential as it distributes the fruity flavor evenly throughout the filling. Make sure to drain the pineapple well to avoid excess moisture, which could result in a soggy dessert. The pineapple should be freshly incorporated for a burst of flavor in every bite.
Step 5: Assemble the dessert.
Spread the cream cheese and pineapple filling evenly over the chilled graham cracker crust. Use a spatula to smooth the top, making sure it reaches all corners and is evenly distributed. This layering is what makes the dessert visually appealing, and an even layer helps ensure that every slice will have a balanced ratio of crust to filling.
Step 6: Chill the dessert.
Cover the assembled dessert with plastic wrap or foil and place it in the refrigerator for at least 4 hours or overnight if possible. Chilling allows the flavors to meld together while setting the filling, which is crucial for achieving a sliceable texture. The longer it chills, the more refreshing and flavorful it becomes.
Step 7: Garnish and serve.
Before serving, top the dessert with optional shredded coconut and Maraschino cherries for a festive look. This is your opportunity to add personal flair to the dessert's presentation. Slice into squares and serve chilled for a delightful taste of summer. The combination of sweet and tangy flavors is sure to please everyone!

Additional Flavor Enhancements
For those looking to elevate the flavor profile of their No Bake Pineapple Dream Dessert, consider adding a splash of rum extract or coconut extract to the filling. These extracts can enhance the tropical vibe and deepen the overall taste. Fresh lime juice is another excellent addition — just a teaspoon can brighten up the flavors and make the dessert even more refreshing with a citrus twist.
Making It Your Own
Feel free to get creative with the toppings and variations of this dessert. Consider incorporating different types of fruit, such as diced strawberries or kiwi, to add a colorful twist. You might even swap the graham cracker crust for a cookie crust using vanilla wafers or even a shortbread cookie base to change the texture and taste. Each variation offers a new way to experience this nostalgic treat.
Perfect For Any Occasion
The No Bake Pineapple Dream Dessert is not just a summertime treat; it's versatile enough to serve at any gathering year-round. Whether it’s a holiday party, family reunion, or birthday celebration, this dessert will shine at the dessert table. It’s simple, elegant, and can be made ahead of time, allowing you to enjoy your event without the stress of last-minute baking.
FAQs
What can I do if my filling is too runny?
If your filling is too runny, it may be due to excess moisture from the pineapple. To fix this, you can add a bit more powdered sugar, which helps to thicken it, or incorporate a small amount of instant pudding mix to stabilize the mixture.
Can I use fresh pineapple instead of canned?
Yes, using fresh pineapple can add a delicious brightness to your dessert. Make sure to finely chop and drain the excess juice to maintain the right texture.
How can I make this dessert even creamier?
For a creamier texture, consider adding an additional layer of whipped topping or using mascarpone cheese in place of cream cheese. This will enhance the richness of the filling.
What if I want to add a crunchy layer inside?
You can add finely chopped nuts or crushed cookies in the middle layer for added texture. Just mix them in gently with the cream cheese mixture before layering it over the crust.
Can I make a larger batch for a crowd?
Absolutely! To scale the recipe for a larger group, simply double or triple the ingredient amounts and use a larger dish. Make sure to adjust the chilling time accordingly.
What can I do if the crust is too crumbly?
If your crust crumbles apart, it may need more melted butter to bind it together. Ensure you press it firmly into the dish, and allow it to chill well before adding the filling.
Is this dessert suitable for those avoiding gluten?
To make a gluten-free version, substitute the graham crackers with gluten-free cookies or crushed gluten-free crackers. Always check labels to ensure all ingredients are gluten-free.
Conclusion
The No Bake Pineapple Dream Dessert is a delightful and uncomplicated treat that brings cheerful flavor to any dining table. Its creamy texture coupled with the refreshing taste of pineapple makes it a crowd-pleaser, ideal for various occasions.
Whether you're indulging in this dessert at a summer barbecue or bringing it to a family gathering, you will find that it delights palates of all ages. Enjoy creating this luscious dish and sharing its tropical joy with friends and family.
Recipe Card
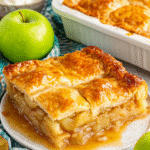
Delightful Apple Slab Pie for Home Bakers
Ingredients
- 4 cups diced apples
- 1 cup granulated sugar
- 2 tablespoons cornstarch
- 1 teaspoon ground cinnamon
- 1 teaspoon vanilla extract
- 1/2 teaspoon salt
- 1 cup unsalted butter 2 sticks
- 2 1/2 cups all-purpose flour
- 1/4 cup cold water
- 1 egg for egg wash
Instructions
- Prepare the crust by combining flour and salt in a bowl.
- Cut in the butter until the mixture resembles coarse crumbs.
- Gradually add cold water while mixing until the dough comes together.
- Divide the dough in two, shape it into disks, wrap, and refrigerate for at least an hour.
- Preheat your oven to 375°F (190°C).
- Roll out one disk for the bottom crust and place it in your baking sheet.
- In a mixing bowl, combine the diced apples, sugar, cornstarch, cinnamon, vanilla, and salt.
- Pour the apple mixture into the prepared crust.
- Roll out the second disk of dough for the top crust and place it over the filling.
- Seal the edges and make slits in the top crust if not using a lattice.
- Brush the top crust with beaten egg for a golden finish.
- Bake for 45-50 minutes or until the apples are tender and the crust is golden brown.
- Allow the pie to cool before slicing.
Notes
Additional serving suggestions: pair with a crisp salad, garlic bread, or roasted seasonal vegetables for balance.
For make-ahead, prep components separately and assemble just before heating to preserve texture.
Taste and adjust with acid (lemon/vinegar) and salt right at the end to wake up flavors.


