Introduction
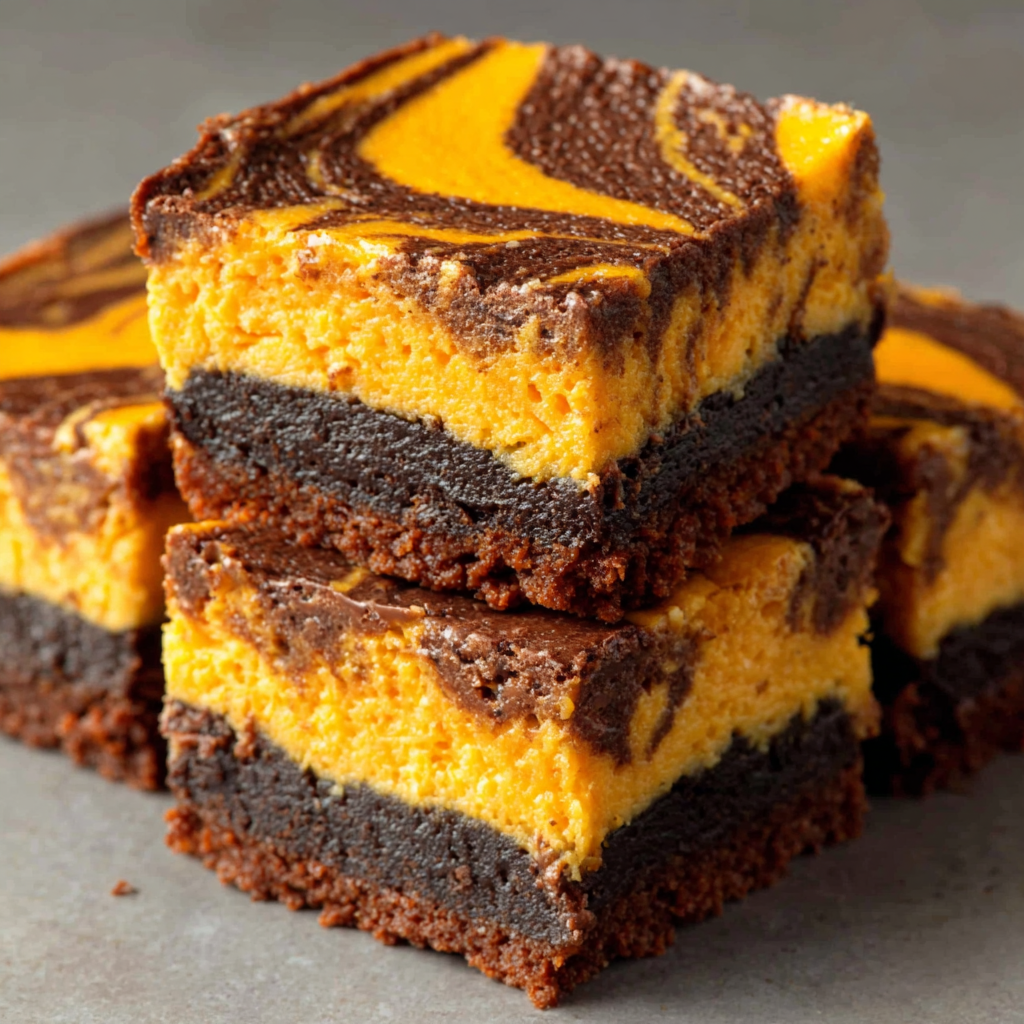
As the leaves begin to fall and the air turns crisp, it’s the perfect time to embrace the flavors of fall with a decadent treat. Pumpkin Chocolate Cheesecake Bars are not only rich and flavorful but also encapsulate the essence of this season. Combining creamy cheesecake with the warmth of pumpkin and the indulgence of chocolate, these bars are ideal for gatherings or a cozy night in.
The luscious texture and contrasting flavors create a delightful experience in every bite. Whether you’re an experienced baker or just starting your culinary journey, this recipe has simple steps that lead to an impressive dessert. Get ready to impress your family and friends with these indulgent pumpkin chocolate cheesecake bars that are sure to become a fall favorite.
Ingredients
- 1 ½ cups graham cracker crumbs
Graham cracker crumbs form the base of the cheesecake bars, providing a sweet and crunchy texture that complements the creamy filling. They also help to create a sturdy crust when mixed with butter. - ½ cup unsweetened cocoa powder
Cocoa powder adds a rich chocolate flavor to the crust and filling, balancing the sweetness of the pumpkin. It also contributes to the deep color and enhances the overall dessert experience. - ⅓ cup granulated sugar
Granulated sugar sweetens the crust and filling, helping to enhance the flavors of both the pumpkin and chocolate. It also aids in achieving a wonderful balance between the bitterness of cocoa and the sweetness of the pumpkin. - ½ cup unsalted butter, melted
Melted butter binds the graham cracker crumbs together, creating a cohesive crust that holds its shape. It also adds moisture and richness to the dessert. - 1 cup pumpkin puree
Pumpkin puree is the star ingredient, adding natural sweetness, moisture, and essential fall flavor. It also provides a vibrant color and nutritional benefits, such as fiber and vitamins. - 16 oz cream cheese, softened
Cream cheese gives the cheesecake bars their signature creamy texture, making them rich and smooth. It's essential to soften the cream cheese beforehand for easy mixing. - ½ cup brown sugar
Brown sugar adds depth to the sweetness with its molasses undertones, enhancing the caramel-like flavors of the pumpkin and creating a more complex taste profile. - 2 large eggs
Eggs are crucial for binding the ingredients together and achieving the desired firm yet creamy texture. They also contribute to the cheesecake's structure as it sets. - 1 tsp vanilla extract
Vanilla extract enhances the overall flavor profile, adding warmth and richness. It complements both the chocolate and pumpkin components beautifully. - ½ cup chocolate chips (dark or semi-sweet)
Chocolate chips add bursts of chocolatey goodness throughout the bars, providing a delightful contrast to the creamy pumpkin mixture. They also enhance the dessert's visual appeal.
Directions & Preparation
Step 1: Preheat the oven to 350°F (175°C).
Preheating the oven ensures that your cheesecake bars bake evenly from the moment you place them inside. This crucial step helps achieve a consistent texture and prevents the bottom from becoming soggy.
Step 2: Prepare the crust by combining graham cracker crumbs, cocoa powder, granulated sugar, and melted butter in a medium bowl.
Mixing these ingredients together creates a cohesive dough that will form your crust. Ensure that the crumbs are well-coated with butter to achieve a nicely packed crust that remains firm after baking.
Step 3: Press the crust mixture into the bottom of a greased 9×9 inch baking pan, ensuring it’s evenly distributed.
Evenly pressing the crust into the pan helps to avoid burnt edges and creates a sturdy base for the cheesecake filling. Use a flat-bottomed glass to compact the crust firmly for optimal results.
Step 4: Bake the crust for 10 minutes, then remove it from the oven and set it aside to cool.
Baking the crust slightly before adding the filling helps set its structure, ensuring a firm base that won’t become soggy when the cheesecake layer is added. Letting it cool will prevent the filling from melting.
Step 5: In a large bowl, beat the softened cream cheese until smooth and creamy using an electric mixer.
Creaming the cheese properly eliminates lumps in your filling, ensuring a silky texture. The electric mixer makes this process quicker and helps incorporate air, which will give the cheesecake a light finish.
Step 6: Add the brown sugar and granulated sugar to the cream cheese, and continue to beat until well blended.
Incorporating the sugars at this stage allows them to dissolve completely, which contributes to a smooth and even filling. This step is essential for achieving well-integrated flavors.
Step 7: Mix in the pumpkin puree, eggs, and vanilla extract until fully combined.
This is where your pumpkin flavor comes to life! Mixing thoroughly is important for achieving a consistent color and flavor throughout the cheesecake filling. Avoid overmixing to prevent incorporating too much air.
Step 8: Fold in the chocolate chips gently, making sure they are distributed evenly.
Folding the chocolate chips in prevents them from sinking to the bottom of the filling. This step allows for bursts of chocolate in every bite while maintaining the integrity of the cream filling.
Step 9: Pour the cheesecake filling over the cooled crust and spread it evenly.
Spreading the filling evenly ensures each bar has a consistent amount of cheesecake. This will help your bars bake evenly and maintain their structure once cut.
Step 10: Bake for an additional 25-30 minutes until the filling is set around the edges but slightly jiggly in the center.
Watching the baking time closely helps achieve the perfect texture. The filling will continue to cook slightly after being removed from the oven, so pulling it when still a bit jiggly ensures it remains creamy.
Step 11: Allow the bars to cool at room temperature, then refrigerate for at least 4 hours or overnight to set completely.
Cooling and chilling the bars allows flavors to meld and the filling to firm up properly. This ensures clean cuts and enhances the overall taste of your dessert.
Step 12: Once set, slice into bars and serve chilled or at room temperature for a luxurious dessert experience.
Serving the bars either chilled or at room temperature allows the flavors to shine through. Cleanly slicing them is easier when they are cold, and they make for an elegant dessert at gatherings.

The Perfect Balance of Pumpkin and Chocolate
Achieving the ideal balance between pumpkin and chocolate in these cheesecake bars is vital for flavor harmony. The earthy sweetness of pumpkin pairs beautifully with the rich bitterness of cocoa, creating a sophisticated dessert. Using both cocoa powder in the crust and chocolate chips in the filling adds depth, making each bite a delightful surprise of flavors that follow the seasons.
Why Chilling is Essential for Cheesecake
Chilling is a crucial step for cheesecake recipes. It allows the bars to set, ensuring they hold their shape when cut. Additionally, chilling helps meld the flavors together, resulting in a more flavorful experience. It's tempting to serve these bars right after baking, but patience pays off, yielding a firmer texture that is more satisfying to eat.
Experimenting with Chocolate Varieties
The choice of chocolate can greatly affect the overall flavor profile of your cheesecake bars. Dark chocolate chips will provide a more intense cocoa flavor, while semi-sweet or milk chocolate can yield a sweeter result. Feel free to experiment with flavored chocolate chips, such as caramel or espresso, for a unique twist on your pumpkin chocolate cheesecake bars, elevating them to new heights.
FAQs
What if my filling is too thick?
If your cheesecake filling turns out too thick, you can add a tablespoon of milk or cream while mixing until it reaches your desired consistency without compromising the flavor.
Can I use different types of chocolate chips?
Yes, you can use dark, semi-sweet, or milk chocolate chips based on your preference. Each will add a different degree of sweetness and bitterness.
How can I ensure even baking?
Position the baking pan in the center of the oven and avoid opening the door while baking, as this can lead to uneven baking and temperature fluctuations.
What should I do if my cheesecake bars aren’t setting properly?
If your cheesecake doesn’t seem to set, it might need more time in the oven. Ensure the edges are set, and if it still appears too runny, bake in additional 5-minute increments.
How do I know when the bars are done baking?
The edges should be firm, while the center retains a slight jiggle. This indicates the bars are set but will firm up upon cooling.
Can I use pumpkin spice instead of pumpkin puree?
Pumpkin spice is not a direct substitute for pumpkin puree. Instead, you would use it to enhance the flavor of actual pumpkin in this recipe.
Conclusion
These Pumpkin Chocolate Cheesecake Bars are a true celebration of fall flavors, combining the creamy texture of cheesecake with the seasonal favorite of pumpkin and delightful chocolate bursts. The baking process is straightforward and rewarding, leading to a dessert that is not only visually stunning but also deliciously addictive.
Perfect for sharing at gatherings or enjoying solo, these bars ensure that each bite is as memorable as the last. So, roll up your sleeves, gather your ingredients, and dive into this delightful baking adventure—your taste buds will thank you!
Recipe Card

Butternut Squash Pasta with Sausage and Spinach for Fall
Ingredients
- 12 ounces of pasta
- 1 medium butternut squash peeled and cubed
- 1 pound of Italian sausage sweet or spicy
- 3 cups fresh spinach
- 1 onion diced
- 3 cloves of garlic minced
- 3 tablespoons olive oil
- 1 teaspoon dried thyme
- Salt and pepper to taste
- 1/2 cup grated Parmesan cheese
Instructions
- Cook the pasta according to package instructions until al dente.
- In a large skillet, heat olive oil over medium heat and sauté the onion until translucent.
- Add minced garlic and Italian sausage to the skillet, breaking it apart, and cook until browned.
- Stir in the butternut squash and thyme, cooking until the squash begins to soften.
- Add fresh spinach and a splash of reserved pasta water, then stir until the spinach wilts.
- Combine the cooked pasta with the sauce, tossing everything together thoroughly.
- Finish with grated Parmesan cheese and serve hot, garnished with extra herbs if desired.
Notes
Additional serving suggestions: pair with a crisp salad, garlic bread, or roasted seasonal vegetables for balance.
For make-ahead, prep components separately and assemble just before heating to preserve texture.
Taste and adjust with acid (lemon/vinegar) and salt right at the end to wake up flavors.


