Introduction
With the holiday season upon us, it's the perfect time to bake some delightful cookies that not only taste amazing but also bring a festive spirit to any gathering. Peppermint Swirl Cookies are a cheerful addition to your holiday baking repertoire and are sure to impress family and friends alike.
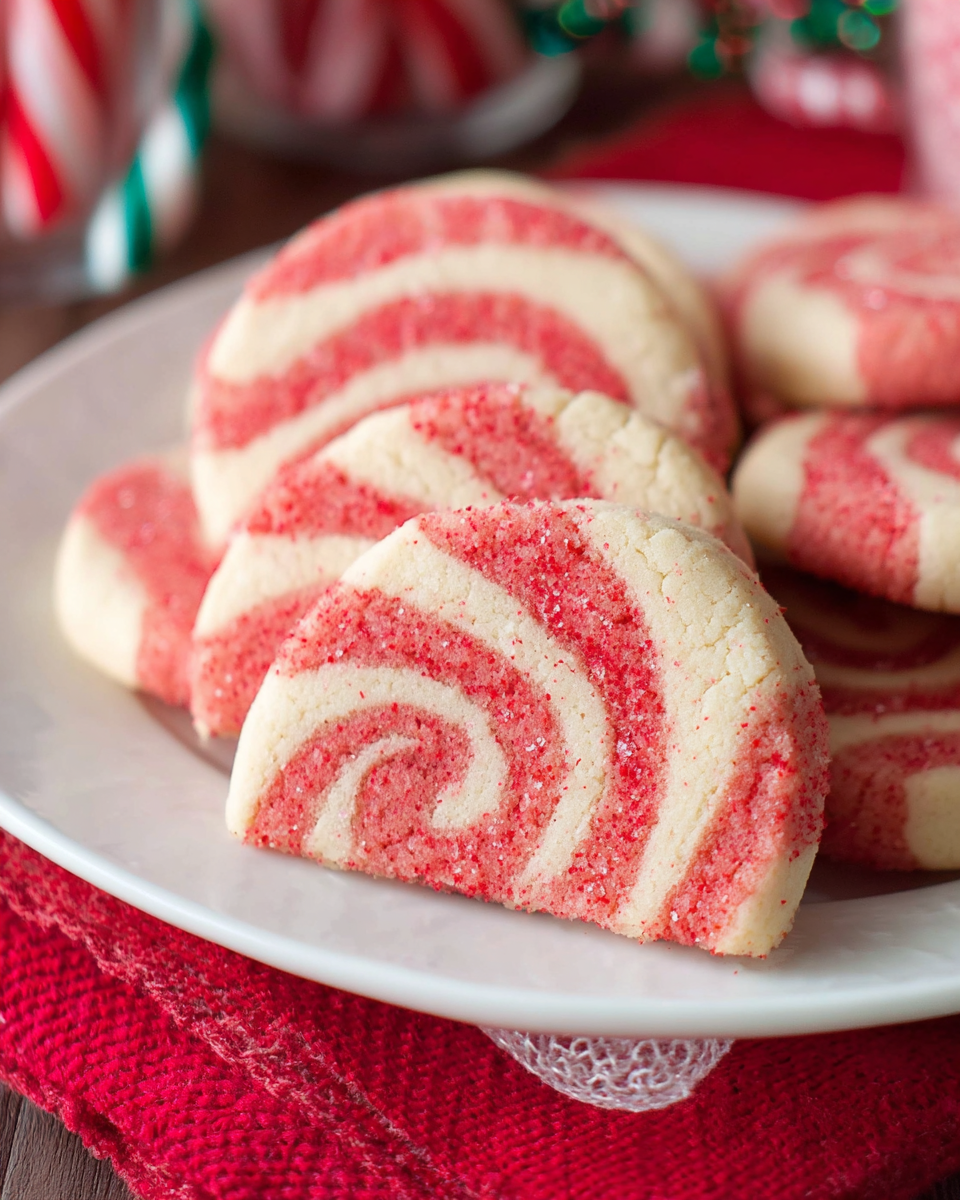
These cookies are characterized by their vibrant red and white swirls, reminiscent of candy canes, and filled with a delicious peppermint flavor. Not only do they look beautiful on a cookie platter, but they also provide that satisfying crunch and chew that everyone loves during the holiday season.
Whether you're baking for a holiday party, gift-giving, or simply to enjoy at home, these Peppermint Swirl Cookies are an absolute must-try. Get ready to fill your kitchen with the delightful aroma of the season!
Ingredients
- 2 ¾ cups all-purpose flour
Flour is the backbone of any cookie recipe, providing structure and stability. All-purpose flour helps achieve the right balance between a chewy and crisp texture, essential for great cookies. - 1 teaspoon baking powder
Baking powder acts as a leavening agent, ensuring your cookies rise correctly and have a light texture. It helps create the fluffy bite that we all love in a freshly baked cookie. - ½ teaspoon salt
Salt enhances the overall flavor of the cookies and balances the sweetness. Just a touch can elevate the taste and bring out the peppermint flavor more prominently. - ½ cup unsalted butter, softened
Butter adds richness and flavor to the cookies. Softened butter incorporates easily with sugars, contributing to a soft and chewy texture that melts in your mouth. - 1 cup granulated sugar
Sugar not only sweetens the cookies, but it also affects their texture. Granulated sugar helps cookies spread out, yielding a slightly crispy edge while keeping the center chewy. - 1 large egg
Eggs bind the ingredients together and add moisture, creating a richer cookie. They also contribute to the structure, helping the cookies hold their shape during baking. - 1 teaspoon peppermint extract
This is the star ingredient that infuses the cookies with a refreshing minty flavor, enhancing the holiday spirit. Peppermint extract adds depth to the taste, making each bite a festive treat. - ½ cup red and white candy melts
Candy melts are used for adding color and flavor to the cookie dough. They create the classic swirl effect, giving your cookies a visually appealing look while enhancing the overall sweetness. - ¼ cup powdered sugar for dusting
Powdered sugar adds a finishing touch, creating a sweet dusting that not only enhances the appearance but also provides a slight sweetness as you bite into the cookies.
Directions & Preparation
Step 1: Preheat your oven to 350°F (175°C).
Preheating your oven is crucial for ensuring that your cookies bake evenly. An adequately heated oven will help achieve the right texture and prevent cookies from spreading too much during baking.
Step 2: In a mixing bowl, whisk together the all-purpose flour, baking powder, and salt.
Combining the dry ingredients first allows for even distribution of the baking powder and salt, ensuring your cookies rise uniformly. This step also helps to avoid clumps of flour in your dough, leading to a more consistent texture.
Step 3: In a separate bowl, cream together the softened butter and granulated sugar until light and fluffy.
Creaming the butter and sugar introduces air into the mixture, helping to achieve a light and airy cookie. This process promotes even baking and fosters the perfect chewy consistency in your finished cookies.
Step 4: Add in the egg and peppermint extract. Mix until well combined.
The egg provides moisture and helps bind the ingredients together, while the peppermint extract infuses the dough with its signature flavor. Mixing well ensures that both ingredients are evenly incorporated into the butter-sugar mixture.
Step 5: Gradually add the dry ingredients to the wet ingredients, mixing until just combined.
It’s essential not to overmix the dough at this stage, as doing so can lead to tough cookies. You want to mix until the flour is just incorporated, leaving a soft, slightly sticky dough.
Step 6: Melt the red and white candy melts in the microwave or using a double boiler.
Melting the candy melts should be done with care to prevent scorching. Working in short intervals in the microwave or using a double boiler allows for smooth, easily swirled chocolate that creates that festive appearance.
Step 7: Divide the cookie dough into two bowls. Stir the melted candy melts into one bowl until fully incorporated.
Dividing the dough ensures you have a contrasting color, creating the iconic swirl effect. Mixing melted candy into one bowl will provide the vibrant red color, enhancing both taste and presentation.
Step 8: Scoop spoonfuls of each dough and place them on a baking sheet lined with parchment paper, alternating colors.
The key to achieving that beautiful swirl effect lies in alternating the two colors of dough on the baking sheet. This method allows the colors to naturally mingle as they bake, resulting in a stunning visual presentation.
Step 9: Bake for 10-12 minutes or until the edges are set and lightly golden.
Baking time is crucial for the perfect cookie texture. Keeping an eye on the edges reaching a golden hue indicates that they are done, while the centers may still look slightly underbaked, which is ideal for a chewy cookie.
Step 10: Let the cookies cool on the baking sheet for a few minutes before transferring to a wire rack.
Cooling the cookies on the baking sheet allows them to firm up slightly before transferring, preventing breakage. This resting period is critical for achieving a perfect consistency and helps the cookies maintain their shape.
Step 11: Dust the cookies with powdered sugar before serving.
A light dusting of powdered sugar adds an elegant touch to the finished cookies. Not only does it enhance appearance, but it also gives a delightful sweetness that balances the peppermint flavor beautifully.

Captivating Colors: The Magic of Swirls
The visual appeal of Peppermint Swirl Cookies is undoubtedly one of their best attributes. The vibrant red and white swirls create a festive look that captures the essence of the holiday season, making them a standout on any cookie platter. Beyond aesthetics, the contrasting candy melt colors enhance the taste, ensuring each bite is both visually and gastronomically delightful. These cookies are perfect for holiday gatherings where presentation matters.
A Festive Flavor That Delights the Senses
The unmistakable flavor of peppermint is synonymous with the holidays, transporting our taste buds into a winter wonderland. Each bite of a Peppermint Swirl Cookie offers a burst of refreshing mint, balanced perfectly with sweetness. This delightful combination brings a familiar warmth and comfort, making these cookies a favorite among both kids and adults. They are not just treats; they evoke the spirit of celebrating togetherness during the festive season.
Baking Memories: Fun for the Whole Family
Baking these Peppermint Swirl Cookies isn't merely about following a recipe; it's an opportunity to create lasting memories with family and friends. Involving loved ones in the baking process—whether mixing the dough, swirling the colors, or decorating—creates a fun and playful atmosphere. This shared activity not only fosters connections but also allows everyone to enjoy the fruits of their labor, resulting in a celebration of both delicious cookies and cherished moments.
FAQs
What should I do if my cookie dough is too thick?
If your cookie dough feels too thick, try adding a teaspoon of milk or water to help loosen it up. This small addition can help the dough mix more easily while maintaining the desired texture.
Can I use a different flavor extract instead of peppermint?
Absolutely! You can swap peppermint extract for other flavors like vanilla, almond, or seasonal flavors like eggnog for a unique twist on these cookies. Just adjust the amount according to your preference.
What can I do if my cookies turn out too dry?
If your cookies are dry, it may be due to overbaking or too much flour. Ensure you measure your flour accurately and keep an eye on the baking time; removing them when they’re slightly underdone will help maintain moisture.
Why are my cookies spreading too much during baking?
Excessive spreading can be a result of the dough being too warm or not enough flour being added. Ensure your cookies are scooped and chilled before baking, and that the flour is measured correctly for consistency.
Can I make these cookies smaller for bite-sized treats?
Yes, you can certainly make smaller cookies! Just adjust the baking time, reducing it by a few minutes. Keep a close eye on them to ensure they don’t overbake.
What if I want to add chocolate chips to my peppermint cookies?
Adding chocolate chips can enhance the cookie's flavor profile. Just fold in a cup of mini chocolate chips after the flour mixture is fully combined, ensuring an even distribution throughout the dough.
Conclusion
Peppermint Swirl Cookies are a perfect blend of festive spirit and delightful flavor. With their signature swirls and refreshing peppermint taste, they’re ideal for any holiday gathering and a great way to create memories in the kitchen.
As you bake these cookies, feel the joy of the season swell in your home. They not only satisfy sweet cravings but also embody the warmth of togetherness, making every bite a celebration of the holidays.
Recipe Card

Deliciously Creamy Cheesy Garlic Scalloped Potatoes
Ingredients
- 4 large russet potatoes
- 2 cups heavy cream
- 1 cup shredded sharp cheddar cheese
- 1 teaspoon garlic powder
- 1 teaspoon salt
- 1/2 teaspoon black pepper
- 1 tablespoon butter
- 1/4 cup grated Parmesan cheese
Instructions
- Preheat the oven to 375°F (190°C).
- Wash and peel the potatoes, then slice them thinly using a mandoline or sharp knife.
- In a large bowl, mix together the heavy cream, garlic powder, salt, and black pepper.
- Add half of the sliced potatoes to a greased baking dish, followed by half of the cream mixture and half of the cheddar cheese.
- Repeat the layers with the remaining potatoes, cream mixture, and top with remaining cheese.
- Dot the top with butter and sprinkle the grated Parmesan cheese over.
- Cover the baking dish with foil and bake for 45 minutes.
- After 45 minutes, remove the foil and bake for an additional 20-25 minutes until golden brown and bubbling.
- Let the dish sit for about 10 minutes before serving.
Notes
Additional serving suggestions: pair with a crisp salad, garlic bread, or roasted seasonal vegetables for balance.
For make-ahead, prep components separately and assemble just before heating to preserve texture.
Taste and adjust with acid (lemon/vinegar) and salt right at the end to wake up flavors.


