Introduction
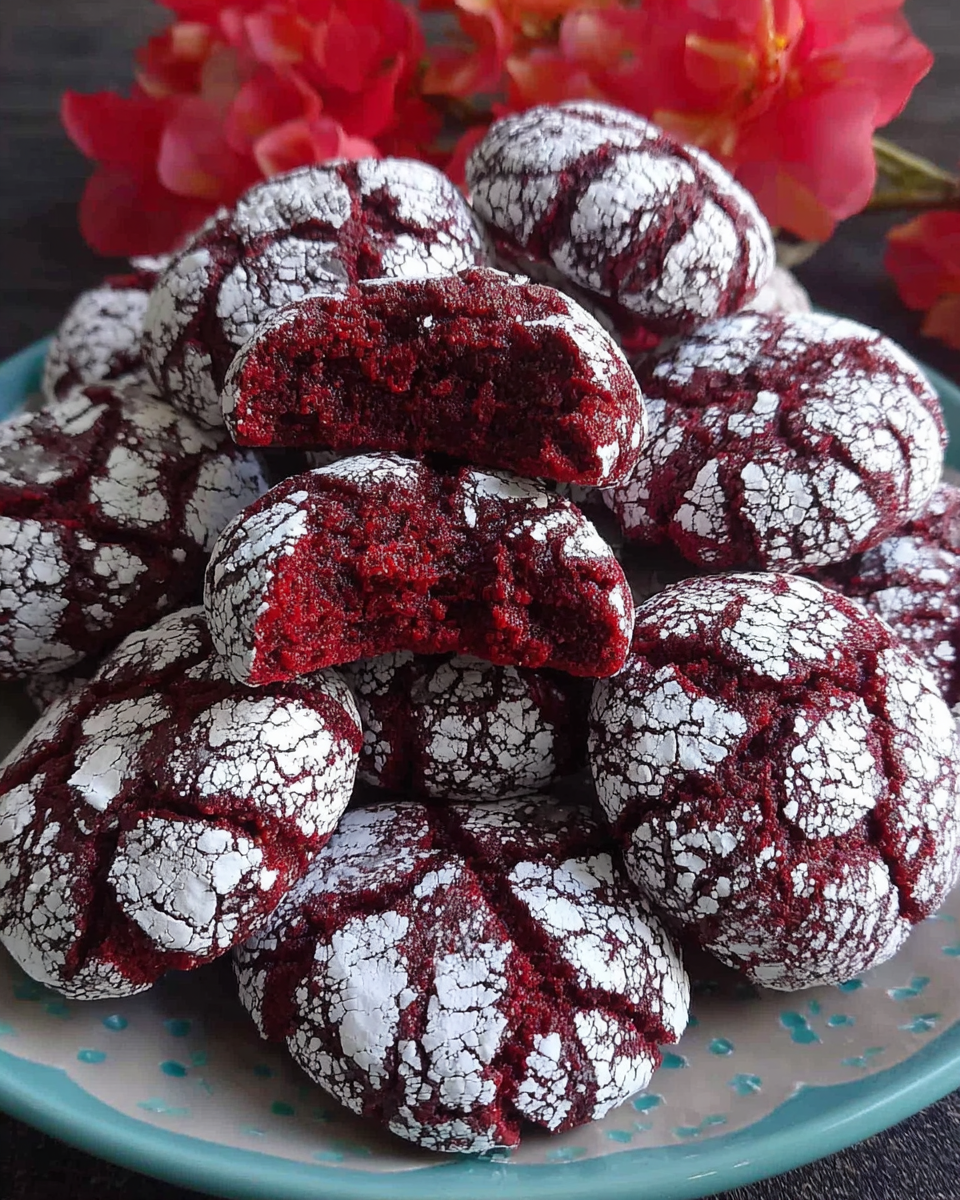
Red velvet crinkle cookies are the perfect festive treat that balances a rich, fudgy interior with a delightful crinkle on the exterior. Their vibrant red color makes them an eye-catching addition to any dessert table, particularly during holiday celebrations. These cookies offer a unique take on traditional red velvet cake, delivering all the flavor in a compact, easy-to-make form.
The combination of cocoa powder and vanilla creates a rich depth of flavor, while the powdered sugar coating contrasts beautifully with the glossy surface. Whether you're sharing them with friends or indulging in a sweet moment alone, these cookies will surely become a favorite for all who try them.
Ingredients
- 2 cups all-purpose flour
All-purpose flour provides the structure needed to hold the cookies together. It helps create a soft yet sturdy crumb, allowing the cookies to maintain their shape while baking. - 1/2 cup unsweetened cocoa powder
Cocoa powder adds the necessary chocolate flavor that defines these cookies, giving them a rich, decadent taste while contributing to their dark red hue. - 1 teaspoon baking powder
Baking powder acts as a leavening agent, helping the cookies rise slightly and create the signature crinkly texture on the top, resulting in a delightful bite. - 1/2 teaspoon baking soda
Baking soda neutralizes acidity from the cocoa powder and helps activate the dough, resulting in a lighter texture with a proper rise during baking. - 1/4 teaspoon salt
Salt enhances the flavors of the other ingredients, ensuring that the sweetness of the cookies is balanced and well-defined. - 1/2 cup unsalted butter, softened
Butter adds richness and moisture to the dough, contributing to the cookies' fudgy texture and lending a lovely buttery flavor that balances nicely with the chocolate. - 1 cup granulated sugar
Sugar sweetens the cookies while helping to create the crispy exterior. It also plays a role in the chemical reactions during baking, influencing the cookie's texture. - 1 large egg
The egg acts as a binder, providing moisture and helping the dough come together. It also adds richness and contributes to the cookies' chewy texture. - 1 teaspoon vanilla extract
Vanilla extract enhances the overall flavor profile of the cookies, adding warmth and depth that compliments the chocolate notes beautifully. - 1 tablespoon red food coloring
Food coloring gives the cookies their signature vibrant red color. It not only makes them visually appealing but also emphasizes the festive theme. - Powdered sugar for coating
The powdered sugar coating provides a sweet contrast to the rich cookie and plays a vital role in creating the iconic crinkle effect when the cookies bake.
Directions & Preparation
Step 1: Preheat your oven to 350°F (175°C).
Preheating the oven ensures that the cookies bake evenly from the moment they go into the oven. It allows the leavening agents to activate properly, contributing to the cookies' rise and texture. A well-preheated oven is essential for achieving that perfect crinkle on top.
Step 2: In a medium bowl, whisk together the flour, cocoa powder, baking powder, baking soda, and salt.
Whisking the dry ingredients together before combining them with the wet ingredients helps to evenly distribute the baking powder and cocoa powder. This initial mixing step ensures your cookies will rise uniformly and have a consistent cocoa flavor throughout.
Step 3: In a large mixing bowl, cream together the softened butter and granulated sugar until light and fluffy.
Creaming butter and sugar is crucial for incorporating air into your mixture, which assists in creating a light texture. This process also dissolves the sugar, preventing grainy cookies and allowing for a smooth, cohesive dough.
Step 4: Add the egg, vanilla extract, and red food coloring into the butter mixture, and mix until combined.
Incorporating the wet ingredients at this stage ensures the color and flavors are evenly distributed throughout the dough. The egg helps bind the mixture together, while the vanilla and food coloring enhance both the taste and visual appeal of the cookies.
Step 5: Gradually add the dry ingredients to the wet ingredients, mixing just until incorporated.
Mixing the dry ingredients into the wet ingredients gradually prevents overmixing, which can develop gluten in the flour and result in tough cookies. Aim for a dough that is slightly sticky but holds its shape well.
Step 6: Refrigerate the dough for at least 30 minutes.
Chilling the dough allows the flavors to meld and makes it easier to scoop and shape the cookies. This step also helps prevent spreading during baking, ensuring a thicker cookie with distinct crinkles.
Step 7: Scoop tablespoon-sized portions of dough and roll each into a ball.
Scooping the dough into equal sizes ensures that all cookies bake at the same rate, providing consistent results. Rolling them into balls also promotes an even distribution of powdered sugar later on, leading to the appealing cracked surface.
Step 8: Roll each ball in powdered sugar, covering it completely.
Rolling the cookie dough in powdered sugar creates a beautiful contrast when they bake, enhancing the crinkle effect. The sugar on the outside will melt slightly, resulting in a delicate, crackled appearance that is both festive and inviting.
Step 9: Place the rolled cookies on a baking sheet lined with parchment paper, spacing them about 2 inches apart.
Spacing the cookies adequately on the baking sheet allows for proper airflow while baking, which helps them rise beautifully and develop their signature texture. The parchment paper also ensures easy removal and prevents sticking.
Step 10: Bake in the preheated oven for 10-12 minutes.
Baking the cookies at the correct temperature for the right length of time is crucial for achieving the perfect fudgy interior and crisp exterior. Keep an eye on them—look for the cracks on top and a set edge to gauge doneness.
Step 11: Remove from the oven and let cool on the baking sheet for a few minutes before transferring to a wire rack.
Cooling on the baking sheet allows the cookies to firm up slightly, making them easier to transfer without falling apart. Once moved to a wire rack, they can cool completely, allowing the texture to set and flavors to deepen.

A Colorful Treat for Any Occasion
The vibrant red color of red velvet crinkle cookies makes them perfect for various celebrations. Whether you're hosting a holiday gathering or simply want a treat to brighten your day, these cookies stand out on any dessert table. Their unique flavor and festive appearance make them an inviting option for birthdays, anniversaries, or even casual get-togethers.
The Magic of Crinkles
The iconic crinkle effect on these cookies is more than just aesthetic; it's a hallmark of a perfectly baked crinkle cookie. This texture results from the combination of powdered sugar and baking agents that create a delicious outer layer while retaining a tender, gooey center. It’s a delightful surprise to bite into a cookie that looks crisp but offers a soft interior.
Customization and Variations
While red velvet crinkle cookies shine in their classic form, there's room for creativity. Consider adding white chocolate chips for a sweet contrast, or mix in some chopped nuts for added crunch. For a seasonal twist, incorporate peppermint extract for a refreshing flavor that complements the cocoa beautifully. Customizing these cookies keeps the spirit of tradition alive while adding your personal touch.
FAQs
What if my dough is too thick?
If your cookie dough feels overly thick, it may be due to too much flour. Ensure you measure accurately. You can also add a touch of milk, one teaspoon at a time, to achieve the desired consistency.
How can I make my cookies less sweet?
To reduce sweetness, consider using less granulated sugar in your dough. You might also decrease the amount of powdered sugar for coating, though this will alter the crinkle effect.
What if my cookies are overcooked?
If your cookies turn out too hard or dry, you may have baked them for too long. Keep a close watch on the baking time, and remove them when they are set around the edges but still slightly soft in the center.
Can I substitute ingredients for these cookies?
Yes, but note that substitutions can affect texture and flavor. For example, using a different type of flour may change the structure. Stick to small adjustments, like a flavored extract or different chocolate, for the best results.
Should I add more cocoa powder for a richer flavor?
Adding more cocoa powder will deepen the chocolate flavor but might also dry out the cookies or affect their structure. If desired, replace a small amount of flour with cocoa powder for a balanced approach.
Can I bake these cookies without chilling the dough?
While you can skip chilling, it’s not recommended. Chilling helps the flavors combine and prevents excessive spreading, ensuring your cookies have the right shape and texture.
Conclusion
Red velvet crinkle cookies are a splendid way to add festivity to any occasion with their rich flavor and stunning appearance. They encapsulate the essence of comfort and celebration in each bite. Whether you ration them among friends or savor them on your own, these cookies promise happiness with each fudgy morsel.
Make a batch today and let the delightful aroma fill your kitchen; these cookies may become a staple in your dessert repertoire. Embrace the process of baking and share the joy that comes with these charming cookies!
Recipe Card
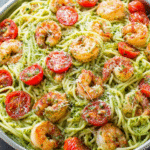
Indulge in Amazing Pesto Shrimp Linguine
Ingredients
- 12 oz linguine
- 1 lb shrimp peeled and deveined
- 1 cup basil pesto
- 2 tbsp olive oil
- 3 cloves garlic minced
- Salt and pepper to taste
- ¼ cup grated Parmesan cheese
- Cherry tomatoes halved (optional)
Instructions
- Cook the linguine according to package instructions
- Sauté the garlic in olive oil
- Add the shrimp to the skillet
- Mix in the pesto and cooked linguine
- Add reserved pasta water as needed
- Season with salt and pepper
- Serve with Parmesan and optional tomatoes
Notes
Additional serving suggestions: pair with a crisp salad, garlic bread, or roasted seasonal vegetables for balance.
For make-ahead, prep components separately and assemble just before heating to preserve texture.
Taste and adjust with acid (lemon/vinegar) and salt right at the end to wake up flavors.


