Introduction
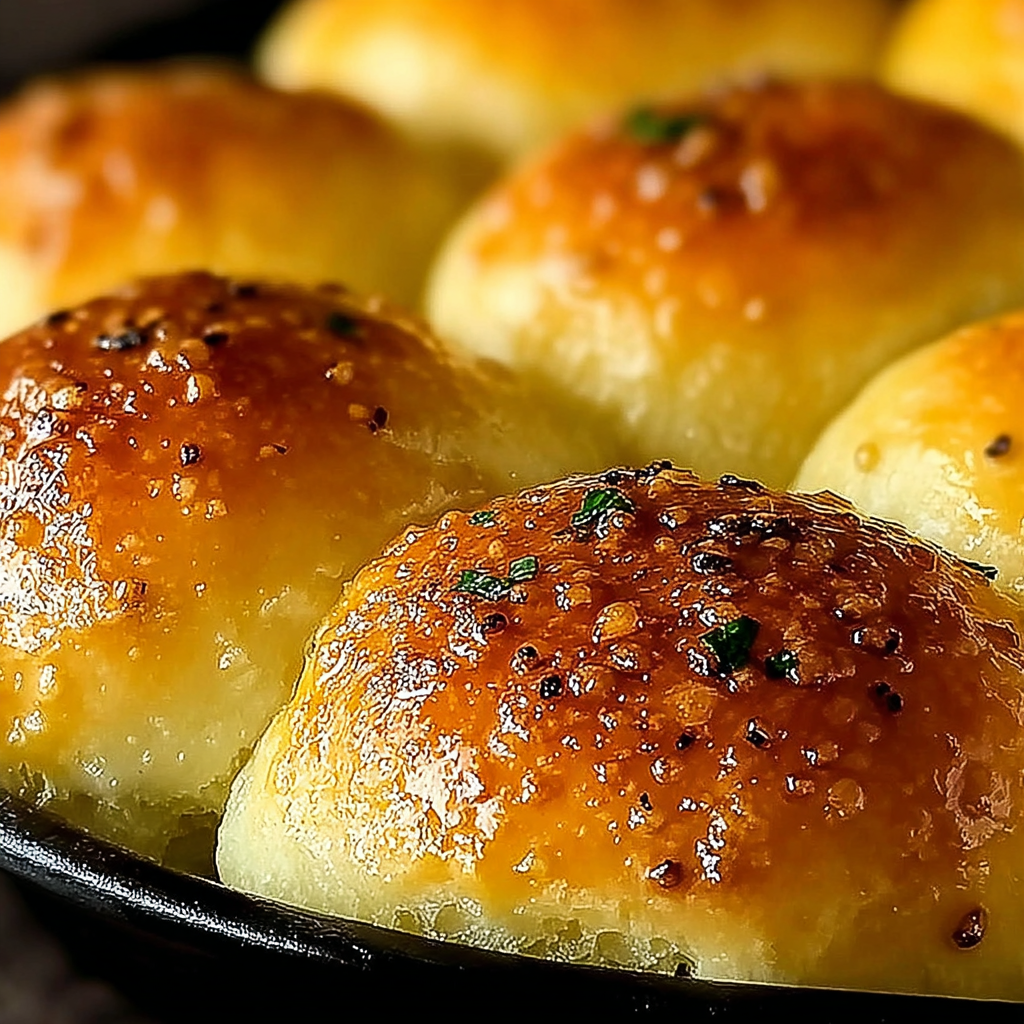
Dinner rolls are a staple of home cooking that can elevate any meal. With the right techniques, even frozen bread dough can become the star of your dinner table, offering a warm, comforting side that pairs wonderfully with soups, stews, and roasted meats.
Using frozen bread dough saves time while still allowing for delicious results. The key is to treat the dough with care and add a few simple ingredients to enhance its flavor and texture. Get ready to impress your family or guests with these mouthwatering dinner rolls that require minimal effort.
Ingredients
- 1 package of frozen bread dough (around 1 lb)
Frozen bread dough serves as the base for these rolls, providing a convenient starting point with a pre-made yeast mixture that saves time. - 2 tablespoons of unsalted butter, melted
Butter adds richness and moisture to the rolls, ensuring they are tender and flavorful. It also helps achieve a golden-brown crust. - 1 tablespoon of sugar
Sugar not only sweetens the rolls slightly but also helps activate the yeast in the dough, leading to a better rise during baking. - 1 teaspoon of salt
Salt enhances the overall flavor of the rolls and regulates yeast activity, ensuring the perfect rise without overpowering the dough. - 1/4 cup of warm water (110°F)
Warm water activates the yeast, providing an environment in which the dough can rise and develop flavor while also contributing moisture. - 1 egg, beaten (for egg wash)
An egg wash creates a shiny, appealing surface on the rolls once baked, making them visually enticing and extra tasty.
Directions & Preparation
Step 1: Thaw the frozen dough overnight in the refrigerator or for a few hours at room temperature.
Thawing the frozen bread dough is crucial for proper fermentation and rise. When thawed at room temperature, the dough will become pliable, allowing for shaping. Ensure it's completely thawed before proceeding to the next step to avoid any delays in rising.
Step 2: Preheat your oven to 375°F (190°C).
Preheating the oven ensures that the dinner rolls will bake evenly. The correct temperature is essential for developing a nice crust and a soft, fluffy interior. Make sure the oven is fully heated before placing the rolls inside.
Step 3: Grease a baking sheet or line it with parchment paper.
Greasing or lining the baking sheet prevents the rolls from sticking and allows them to rise freely without any hindrance. This step is vital for clean baking and easy removal once the rolls are finished. Parchment paper can also help in achieving an even bake.
Step 4: Combine melted butter, sugar, and salt in a large mixing bowl, then add warm water and mix well.
Combining these ingredients helps distribute the flavors evenly throughout the dough and activates the yeast. The warm water is key in making sure everything blends seamlessly and supports the dough’s yeast activity for a good rise.
Step 5: Add the thawed bread dough to the mixture and knead until smooth.
Kneading incorporates air into the dough, which is essential for achieving that light, airy texture in your rolls. Knead for about 5-7 minutes until the dough is smooth and elastic. This step activates the gluten, leading to a delightful final product.
Step 6: Shape the dough into small balls (about 1-2 inches in diameter) and place them on the prepared baking sheet.
Shaping the dough into balls helps ensure uniform cooking and that each roll has adequate surface area for that perfect crust. Pack them closely together for pull-apart rolls, or leave some space if you prefer more distinct rolls.
Step 7: Cover the rolls with a clean kitchen towel and let them rise in a warm place for about 30-45 minutes.
Allowing the rolls to rise is crucial for developing their fluffy texture. The warmth encourages yeast fermentation, making the dough expand. Look for the dough to double in size as a good indicator that they're ready for baking.
Step 8: Brush the risen rolls with beaten egg for a shiny finish.
Applying an egg wash before baking not only adds shine but also gives the rolls a beautiful golden-brown color. This simple step enhances the visual appeal of your dinner rolls, making them look as good as they taste.
Step 9: Bake in the preheated oven for 15-20 minutes, or until golden brown.
Baking time is critical; underbaking may result in doughy centers, while overbaking can lead to dryness. Most importantly, watch the rolls closely as they approach the recommended time. They should be golden and sound hollow when tapped on the bottom.
Step 10: Remove from the oven and brush with melted butter immediately.
Brushing melted butter on the rolls right after baking adds a delightful shine and additional flavor. The warmth from the rolls helps the butter soak in, keeping them moist and enhancing their rich, buttery taste.

Experimenting with Flavors
While this recipe focuses on the classic dinner roll, there's a world of possibilities when it comes to flavor. Consider adding herbs like rosemary or thyme into the dough for a fragrant twist, or mix in shredded cheese for a cheesy version. Garlic powder or minced garlic can bring an aromatic depth. Just be cautious with stronger flavors to ensure they complement rather than overwhelm the rolls.
Troubleshooting Common Issues
If your rolls turn out dense or hard, it may have resulted from too little rising time, inadequate kneading, or overbaking. Ensuring that the dough rises sufficiently and is kneaded properly will lead to the lightest and softest rolls. Be sure to watch the baking time, checking for doneness a few minutes before the timer goes off to avoid drying them out.
Scaling for Larger Batches
This recipe is easily scalable for larger gatherings. Simply multiply the ingredient quantities as needed. If you increase the dough significantly, consider using extra baking sheets and rotating them in the oven for even baking. Also, ensure you have adequate rising space; larger batches may require extra time for the rolls to fully rise, so plan accordingly.
FAQs
Can I add spices to the dough for a unique flavor?
Yes, feel free to incorporate your favorite spices or herbs into the dough for added flavor.
What should I do if my rolls are too hard after baking?
If your rolls come out hard, it’s likely due to overbaking or insufficient moisture. Adjusting the baking time and ensuring a proper rise can prevent this.
How can I ensure each roll rises evenly?
Leave enough space between the rolls on the baking sheet to allow for proper expansion during the rise.
What variations can I use for the butter topping?
You can mix herbs, garlic, or spices into the melted butter for a flavorful topping once baked.
Can I use whole wheat frozen dough for this recipe?
Absolutely, whole wheat dough can add a nutty flavor and is a healthier alternative.
What if my dough doesn’t rise?
If the dough doesn't rise, it may be due to lack of warmth or old yeast. Make sure the environment is warm and check the expiration date on your dough.
Conclusion
In just a few simple steps, you've transformed frozen bread dough into fluffy, flavorful dinner rolls that add a special touch to your meals. These rolls are not only delicious but also a testament to the joy of baking at home.
Whether you're enjoying them fresh out of the oven or serving them alongside a hearty meal, your homemade dinner rolls will surely impress. So next time, consider reaching for that frozen dough and bringing something special to your table.
Recipe Card

Delicious Dinners for Cozy Fall Nights
Ingredients
- 1 butternut squash peeled and diced
- 4 cups chicken or vegetable broth
- 1 onion chopped
- 2 cloves garlic minced
- 1 teaspoon ground cinnamon
- 1 tablespoon olive oil
- Salt and pepper to taste
- 1 cup cooked quinoa or rice optional
- Fresh herbs for garnish like parsley or sage
Instructions
- Sauté the onion and garlic in olive oil.
- Add the diced butternut squash and broth.
- Include cinnamon, salt, and pepper.
- Simmer until the squash is tender.
- Blend until smooth (optional).
- Stir in cooked quinoa or rice (if using).
- Garnish with fresh herbs and serve.
Notes
Additional serving suggestions: pair with a crisp salad, garlic bread, or roasted seasonal vegetables for balance.
For make-ahead, prep components separately and assemble just before heating to preserve texture.
Taste and adjust with acid (lemon/vinegar) and salt right at the end to wake up flavors.