Introduction
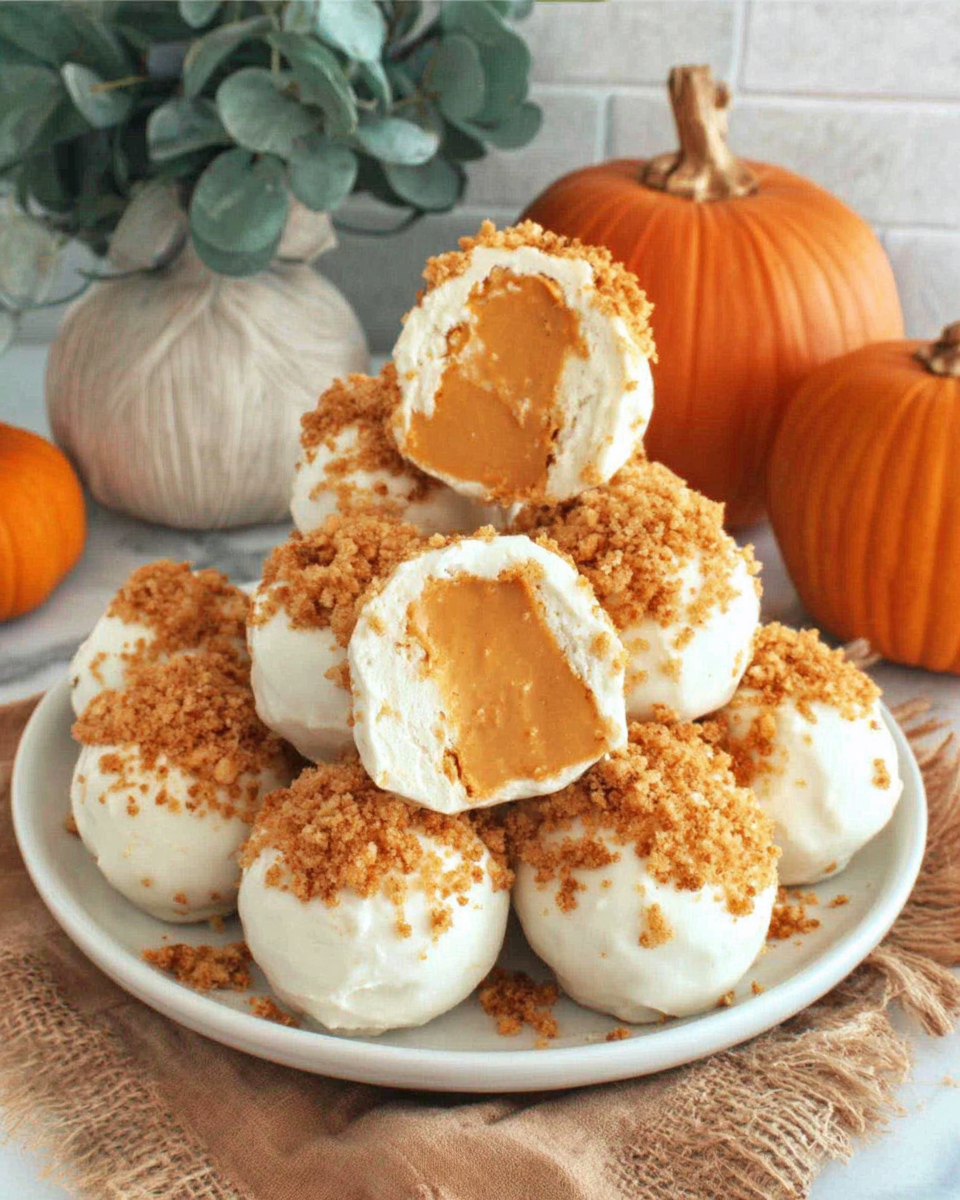
As the leaves turn golden and the air cools, it's time to indulge in the flavors of fall. What could be more delightful than a no-bake dessert that combines the creamy sweetness of cheesecake with the warm spices of pumpkin? Pumpkin cheesecake balls are the answer to your cravings.
These bite-sized treats are perfect for gatherings, parties, or simply enjoying at home while cozying up with a good book. With a blend of rich cream cheese, fragrant pumpkin, and buttery graham cracker crumbs, they deliver a taste experience you won't want to miss.
Not only are they easy to prepare, but they also require no baking, making them an ideal choice for those who want a delicious dessert without heating up the kitchen. Let's dive in and discover how to whip up these irresistible pumpkin cheesecake balls.
Ingredients
- 8 oz cream cheese, softened
Cream cheese provides the creamy base for the cheesecake balls, giving them a smooth texture that melts in your mouth. - 1 cup pumpkin puree
Pumpkin puree adds natural sweetness and moisture, along with a rich, fall-inspired flavor that defines the dessert. - 1/2 cup powdered sugar
Powdered sugar ensures a fine sweetness and helps to achieve a smooth consistency in the mixture, blending seamlessly with the cream cheese. - 1 teaspoon vanilla extract
Vanilla extract enhances the overall flavor profile, adding a delightful aromatic touch that complements the pumpkin and spices. - 1 teaspoon pumpkin pie spice
This spice blend (typically cinnamon, nutmeg, and ginger) provides the warm, cozy flavors associated with fall and pumpkin desserts. - 1 cup graham cracker crumbs
Graham crackers add a crunchy texture and sweetness, serving as the foundation for the cheesecake balls, while they also provide a classic cheesecake taste. - 1/2 cup chopped pecans or walnuts (optional)
Chopped nuts can give a contrasting crunch and a nutty flavor, elevating the dessert if you wish for an extra layer of texture. - Chocolate or white chocolate for coating (optional)
Melting chocolate for coating adds a sweet, rich exterior that not only enhances the visual appeal but also offers a delicious contradiction to the creamy center.
Directions & Preparation
Step 1: In a mixing bowl, combine softened cream cheese and pumpkin puree.
Start by blending the cream cheese and pumpkin puree in a large mixing bowl. This step is vital because it creates a smooth base for your cheesecake filling. Make sure the cream cheese is at room temperature to facilitate easy mixing. Using an electric mixer can further ensure that the mixture is creamy without lumps, which is key for a delectable texture.
Step 2: Add powdered sugar, vanilla extract, and pumpkin pie spice to the mixture.
Next, sift in the powdered sugar along with the vanilla extract and pumpkin pie spice. This step helps ensure an even distribution of flavors and sweetness throughout the mixture. Taste as you go to achieve the perfect balance of sweetness and spice that suits your palate. The aromatic blend should remind you of festive fall desserts.
Step 3: Fold in graham cracker crumbs until fully incorporated.
Gently fold the graham cracker crumbs into the mixture, ensuring that they are evenly dispersed. This is crucial as the crumbs provide structure to your cheesecake balls, allowing them to hold their shape when formed. Be careful not to over-mix, as you want to preserve the airy texture of the filling.
Step 4: Refrigerate the mixture for about 30 minutes.
Chilling the mixture is an important step that aids in making it firm enough to shape into balls. The cooling allows the flavors to meld and enhances the overall taste of the cheesecake balls. Use this time to prepare your workspace and any coating ingredients, like melted chocolate, if you choose to use them.
Step 5: Scoop out portions of the mixture and roll into balls.
Once chilled, use a small cookie scoop or your hands to portion out the mixture, rolling it into bite-sized balls. This step allows the dessert to take its signature shape. Consider using gloves or dampening your hands slightly if the mixture is sticky, which can help in handling the mixture smoothly.
Step 6: Optionally, dip the balls in melted chocolate or simply roll them in graham cracker crumbs.
If you're adding an outer layer, melt your chosen chocolate and dip each ball before placing it back onto a baking sheet. This adds another delicious layer of flavor and texture that complements the creaminess of the filling. Alternatively, rolling them in extra graham cracker crumbs will give a more traditional cheesecake experience.
Step 7: Chill again for at least 1 hour before serving.
After shaping and coating your cheesecake balls, refrigerate them again for at least an hour. This final chill sets everything, ensuring they firm up nicely for serving. It's also a great opportunity for flavors to develop further, making them even more enjoyable when you finally take a bite.
Step 8: Serve and enjoy!
Once your cheesecake balls are set, they are ready to be enjoyed! Arrange them on a decorative plate or a festive serving platter for gatherings. Their appealing look and delightful taste will surely impress your guests. Don’t forget to store any leftovers in an airtight container in the refrigerator, prolonging their deliciousness.

Pumpkin Spice Perfection
The magical blend of spices like cinnamon, nutmeg, and ginger defines the essence of fall in these no-bake treats. By incorporating pumpkin pie spice, you not only enhance the flavor profile but also evoke the coziness often associated with the season. Each bite brings warmth and nostalgia, reminding us of festive gatherings and comforting autumn desserts.
A Sweet Touch with Nuts
Adding chopped pecans or walnuts introduces a delightful crunch to the creamy texture of the cheesecake balls. The savory notes from the nuts contrast beautifully with the sweet filling, creating a multi-dimensional experience. This optional step not only elevates the taste but also adds a touch of elegance to your dessert, making it a standout choice for entertaining.
Creative Coatings for Fun Appeal
Dipping the cheesecake balls in chocolate transforms them into an even more indulgent treat, while rolling them in graham cracker crumbs reinforces that classic cheesecake essence. The choice of coating allows for creativity in presentation, catering to various palates. Whether you go for the smooth sheen of chocolate or the rustic charm of crumbs, each option delivers a unique twist to the traditional flavor.
FAQs
What if my mixture is too thick?
If your filling is too thick to roll into balls, consider adding a bit more softened cream cheese or a splash of milk to loosen it up slightly. Mix thoroughly until you achieve a manageable consistency.
Can I use a different nut for the coating?
Absolutely! You can use any chopped nuts you prefer, such as almonds or hazelnuts, for a unique flavor and added crunch.
What can I do if the chocolate coating is too thick?
If your melted chocolate is too thick for dipping, consider adding a small amount of vegetable oil or shortening to thin it out, achieving a smooth consistency for coating.
How can I make the balls smaller for bite-sized treats?
You can easily scale down the size of the scoops. Use a smaller scoop or shape them by hand to make mini-sized pumpkin cheesecake balls that are perfect for snacking.
What if my graham cracker crumbs are too coarse?
If your crumbs are too coarse, you can pulse them in a food processor for a finer texture, ensuring a smoother coating and integration into the cheesecake mixture.
Can I mix in chocolate chips for added texture?
Yes! Adding mini chocolate chips to the cheesecake ball mixture can introduce a delightful surprise. Just ensure they are evenly mixed in before rolling into balls.
Conclusion
Making no bake pumpkin cheesecake balls is not just a quick and easy dessert; it’s also a delightful project that brings together the warmth of autumn flavors with a fun hands-on experience.
These little treats are sure to be a hit at any gathering, and they are versatile enough to adapt to your personal taste preferences. Enjoy the flavor of pumpkin year-round with this simple recipe!
Recipe Card
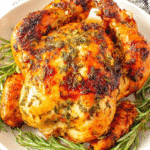
Savory Garlic Herb Roasted Chicken Delight
Ingredients
- 1 whole chicken 3-4 lbs
- 6 cloves garlic minced
- 3 tablespoons olive oil
- 2 tablespoons fresh rosemary chopped
- 2 tablespoons fresh thyme chopped
- 1 lemon zested and juiced
- Salt and pepper to taste
Instructions
- Preheat your oven to 425°F (220°C).
- Prepare the chicken by rinsing and patting it dry with paper towels.
- In a small bowl, mix the olive oil, minced garlic, chopped rosemary, chopped thyme, lemon zest, lemon juice, salt, and pepper.
- Rub the herb mixture all over the chicken, ensuring to get under the skin where possible.
- Place the chicken breast-side up on a roasting pan.
- Roast the chicken for 1 hour to 1 hour and 15 minutes, or until the internal temperature reaches 165°F (74°C).
- Let the chicken rest for 10-15 minutes before carving.
- Carve and serve your Garlic Herb Roasted Chicken.
Notes
Additional serving suggestions: pair with a crisp salad, garlic bread, or roasted seasonal vegetables for balance.
For make-ahead, prep components separately and assemble just before heating to preserve texture.
Taste and adjust with acid (lemon/vinegar) and salt right at the end to wake up flavors.


