Introduction
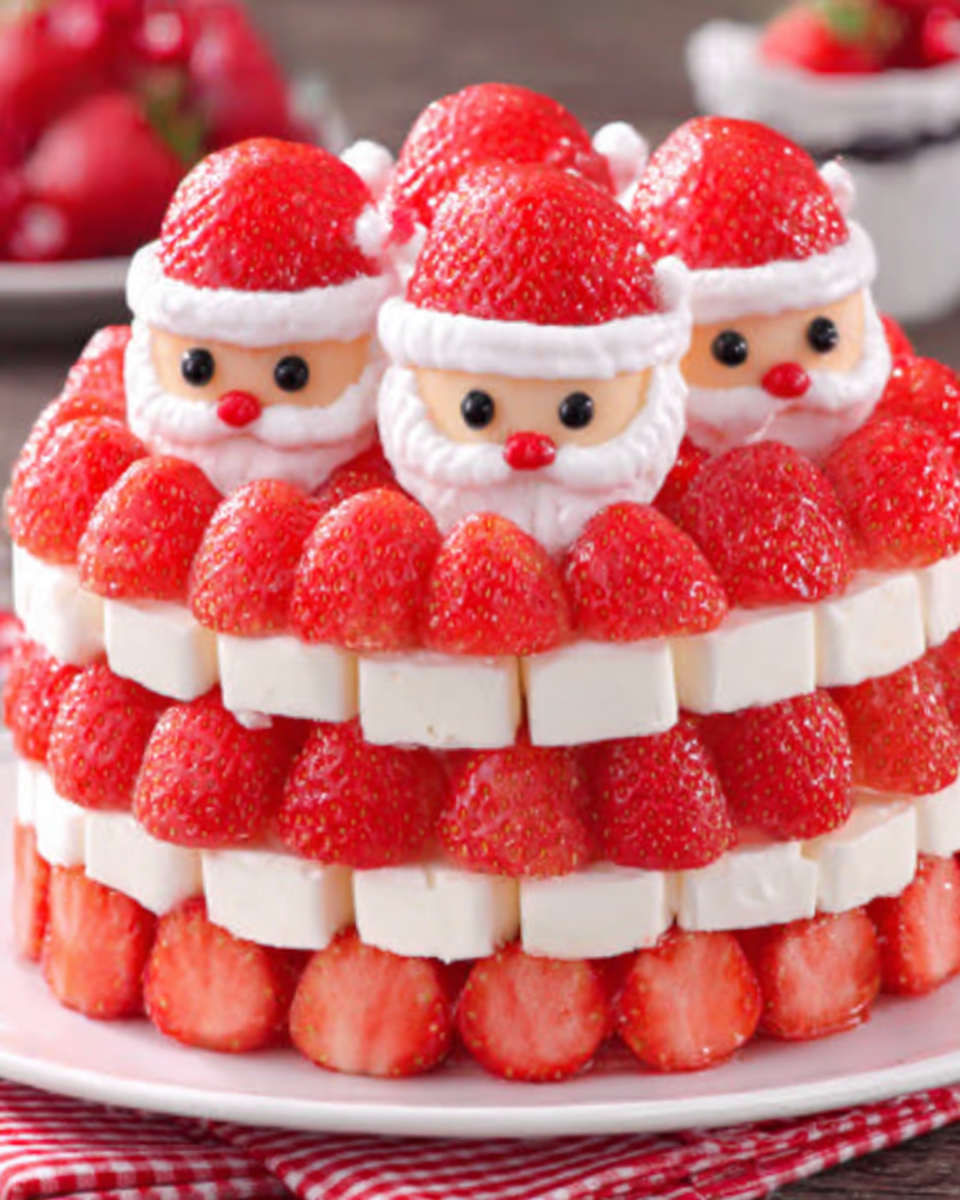
With the holiday season upon us, it's time to bring a bit of festive cheer into our kitchens. While traditional desserts often take center stage, this year, why not create something whimsical yet delicious? Cheesecake Strawberry Santas are a fun twist on classic cheesecakes, transforming them into adorable little Santas that are sure to bring smiles to both young and old alike.
These delightful treats are not only visually appealing but also surprisingly easy to make. With just a few ingredients and a bit of creativity, you can assemble these charming strawberry Santas that will impress your family and friends. Plus, they add a playful touch to any holiday spread, making them perfect for parties and gatherings.
Ingredients
- 8 oz cream cheese, softened
Cream cheese is the main ingredient in cheesecake, providing a rich and creamy texture. Its smooth consistency helps bind other ingredients together, ensuring that each bite is blissfully luscious. - 1/3 cup granulated sugar
Sugar is crucial for sweetness, balancing the tangy flavor of cream cheese. It also contributes to the overall structure of the cheesecake, helping to create a smooth, creamy filling. - 1 tsp vanilla extract
Vanilla extract enhances the overall flavor profile of the cheesecake. It adds warmth and depth, complementing the richness of the cream cheese while harmonizing with the strawberries. - 1 cup whipped cream, plus more for decorating
Whipped cream adds lightness to the cheesecake filling, creating a fluffy texture. It can also be used in decorating the Santas, adding a playful and festive touch. - 1 lb fresh strawberries
Strawberries are the stars of this recipe, serving as the Santa hats and faces. Their natural sweetness and vibrant color make them a perfect choice for creating festive and fun designs. - Chocolate chips, for eyes
Chocolate chips are used for the finishing touch, giving a playful look to the Santas. They’re easy to work with and provide a delightful contrast in flavor to the strawberries.
Directions & Preparation
Step 1: Prepare the cheesecake filling.
Start by beating the softened cream cheese in a mixing bowl until smooth. Gradually add in the sugar and vanilla extract, continuing to mix until fully combined. This step is crucial as it ensures that the cream cheese is properly aerated, leading to a smoother filling. Avoid over-beating as it can introduce too much air, which may cause cracks in the cheesecake.
Step 2: Fold in the whipped cream.
Gently fold the whipped cream into the cheesecake mixture using a spatula. This step adds lightness to the filling, making it airy and fluffy. Take care not to deflate the whipped cream, as it lends a delicate texture to the cheesecake. The result should be a harmonious blend, neither too stiff nor too runny.
Step 3: Prepare the strawberries.
Wash and dry the strawberries thoroughly, then slice off the tops to create a flat surface. This will enable the strawberries to stand upright and serve as Santa’s body and hat. Uniformity in size helps create a cohesive look, ensuring each Santa is proportionate—so choose berries that are similar in size for the best results.
Step 4: Assemble the Cheesecake Strawberry Santas.
Spoon the cheesecake filling into the hollowed strawberries, filling them generously to create a rounded figure. Angle the strawberries to help shape their bodies and hats. Place a small whipped cream dollop on top for the hat's fluffy finish. This step combines creativity with precision, requiring a steady hand to showcase Santa’s form.
Step 5: Add chocolate chips for eyes.
Gently press two chocolate chips into each filled strawberry to create Santa's eyes. Ensure they are strategically placed for the best facial expression, enhancing the character of your Santas. The use of chocolate adds a delightful surprise with every bite, harmonizing beautifully with the flavors of the cheesecake.
Step 6: Chill the assembled Santas.
Once assembled, place the Cheesecake Strawberry Santas in the refrigerator for at least one hour to set. Chilling allows the flavors to meld and improves the texture, making them easier to serve. Adequate chilling is key in ensuring the cheesecake maintains its integrity when served.
Step 7: Serve and enjoy!
Present your Cheesecake Strawberry Santas on a festive platter for a delightful holiday treat. The vibrant colors and playful appearance will certainly charm your guests. Enjoy them fresh; the combination of cream cheese, strawberries, and whipped cream creates a wonderfully tasty dessert that’s as fun to eat as it is to make.

A Festive Presentation
The visual appeal of Cheesecake Strawberry Santas is key to their festive charm. Arrange them on a decorative platter with some edible greenery or mint leaves to enhance the holiday spirit. Consider sprinkling powdered sugar around the Santas for an added touch of whimsy, making them look like they’ve been dusted with fresh snow.
Customizing Your Santas
Feel free to make your Cheesecake Strawberry Santas your own! You can use different types of berries, such as blueberries or raspberries, to create a variety of flavors. Add multiple layers of whipped cream to enhance the appearance and increase the fun factor. Experiment with edible decorations like colorful sprinkles or coconut flakes for a winter wonderland touch.
Pairs Perfectly with Holiday Cheer
These Cheesecake Strawberry Santas not only shine at dessert time but would also pair well with a warm cup of cocoa or a festive cocktail. Their light and sweet profile can counterbalance richer flavors, creating an enjoyable dining experience. Consider serving them after a hearty holiday meal to bring a refreshing end to your celebration.
FAQs
What if my filling is too thick?
If the cheesecake filling is too thick, it might be due to over-beating. You can gently fold in a little more whipped cream to add lightness and increase the volume, making it easier to fill the strawberries.
Can I use frozen strawberries?
Using frozen strawberries is not recommended, as they can become mushy once thawed. Fresh strawberries provide the best texture and presentation for your Santas.
How can I make these Santas allergen-friendly?
To make allergen-friendly versions, consider using dairy-free cream cheese alternatives and non-dairy whipped toppings. Adjust the recipe accordingly while ensuring flavors remain balanced.
Can I make the filling ahead of time?
Yes, you can prepare the cheesecake filling in advance and store it in the refrigerator. However, assemble the Santas just before serving to ensure the strawberries remain fresh.
What can I use if I don’t have chocolate chips?
If you don't have chocolate chips, you can use small dots of dark chocolate or edible eyes that can be found in baking aisles. Each alternative offers a fun look for your Santas.
How do I know when my Santas are ready to serve?
Your Cheesecake Strawberry Santas are ready when the filling is firm yet creamy, and the strawberries have chilled adequately to hold their shape. They should feel cool to the touch.
Conclusion
Creating Cheesecake Strawberry Santas is not just about baking; it’s about making memories and bringing joy during the festive season. These adorable treats are sure to become a family favorite, allowing for moments of creativity and fun in the kitchen.
So gather your ingredients and get ready to impress your guests with a dessert that is both charming and delicious. Celebrate the spirit of the holiday season this year with these delightful little Santas, bringing sweetness and laughter to your table.
Recipe Card
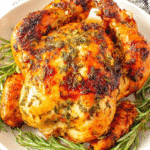
Savory Garlic Herb Roasted Chicken Delight
Ingredients
- 1 whole chicken 3-4 lbs
- 6 cloves garlic minced
- 3 tablespoons olive oil
- 2 tablespoons fresh rosemary chopped
- 2 tablespoons fresh thyme chopped
- 1 lemon zested and juiced
- Salt and pepper to taste
Instructions
- Preheat your oven to 425°F (220°C).
- Prepare the chicken by rinsing and patting it dry with paper towels.
- In a small bowl, mix the olive oil, minced garlic, chopped rosemary, chopped thyme, lemon zest, lemon juice, salt, and pepper.
- Rub the herb mixture all over the chicken, ensuring to get under the skin where possible.
- Place the chicken breast-side up on a roasting pan.
- Roast the chicken for 1 hour to 1 hour and 15 minutes, or until the internal temperature reaches 165°F (74°C).
- Let the chicken rest for 10-15 minutes before carving.
- Carve and serve your Garlic Herb Roasted Chicken.
Notes
Additional serving suggestions: pair with a crisp salad, garlic bread, or roasted seasonal vegetables for balance.
For make-ahead, prep components separately and assemble just before heating to preserve texture.
Taste and adjust with acid (lemon/vinegar) and salt right at the end to wake up flavors.


