Introduction
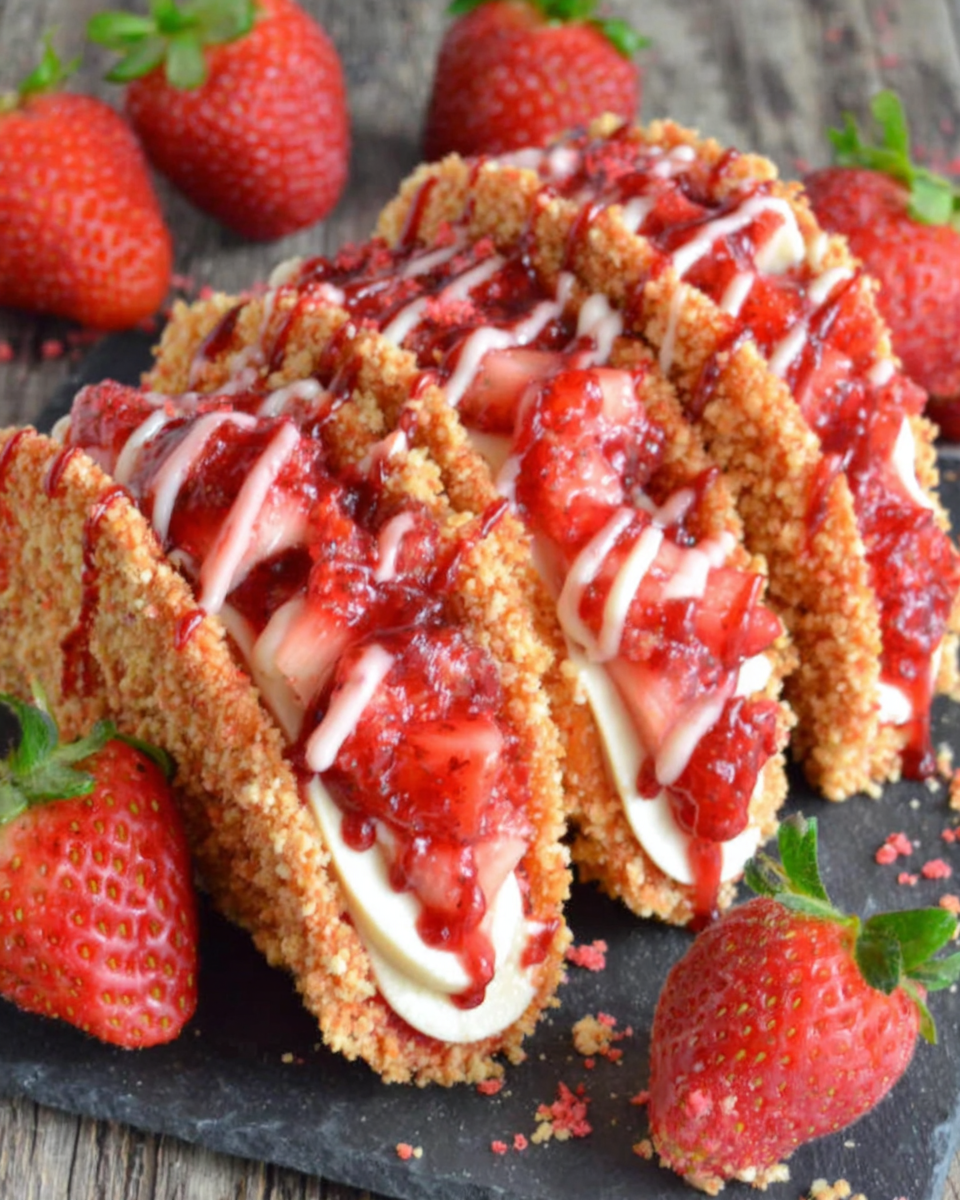
If you're searching for a unique twist on dessert, look no further than strawberry crunch cheesecake tacos. These delightful treats combine the creamy richness of cheesecake with the vibrant freshness of strawberries, all wrapped up in a crunchy taco shell. Perfect for any occasion, they offer a fun and delicious way to enjoy dessert.
The combination of textures and flavors will leave your taste buds dancing. Imagine a crisp taco shell filled with smooth, velvety cheesecake and topped with a sweet strawberry crunch. Whether for a summer barbecue or a cozy family dinner, these tacos are sure to impress.
Not only are they visually appealing, but they also bring the joy of assembly to the dessert table. Everyone can customize their tacos with their favorite toppings, making them an interactive dessert option that is as enjoyable to make as it is to eat.
Ingredients
- 12 taco shells
The taco shells provide a crunchy base that contrasts beautifully with the creamy cheesecake filling. Choose ones that are sturdy enough to hold the filling without breaking. - 16 oz cream cheese
This is the main ingredient that creates the rich, smooth cheesecake filling. Ensure it's softened to room temperature for easy mixing. - 1 cup powdered sugar
Powdered sugar sweetens the filling while giving it a smoother texture compared to granulated sugar; it dissolves easily, ensuring a creamy consistency. - 1 tsp vanilla extract
Vanilla extract enhances the overall flavor profile of the cheesecake, adding a warm and inviting aroma to the dessert. - 1 cup heavy cream
When whipped, heavy cream adds lightness and a luxurious mouthfeel to the cheesecake filling, providing a lightness that balances the richness of the cream cheese. - 1 1/2 cups fresh strawberries, diced
Fresh strawberries not only bring a burst of fruity flavor but also add a refreshing element to the cheesecake, complementing its richness immensely. - 1 cup crushed graham crackers
Crushed graham crackers add a crunchy texture that contrasts nicely with the smooth filling and mimics the classic cheesecake crust. - 1/4 cup melted butter
Melted butter binds the crushed graham crackers together, providing a cohesive texture for the crunchy topping that finishes off the tacos.
Directions & Preparation
Step 1: Prepare the taco shells.
Begin by preheating your oven to 350°F (175°C). Arrange the taco shells on a baking sheet and bake them for about 5 minutes or until they are slightly crispy. This step is crucial because it helps to create a more stable taco shell that can withstand the filling. Crispy shells not only hold the cheesecake filling better but also add to the overall textural experience.
Step 2: Make the cheesecake filling.
In a large mixing bowl, combine the softened cream cheese and powdered sugar. Beat until smooth and creamy. Next, add the vanilla extract followed by the heavy cream. Beat the mixture until it reaches stiff peaks, which usually takes about 3-5 minutes. This step is essential as it incorporates air, making the filling light and fluffy, creating a delightful contrast with the crunchy shell.
Step 3: Incorporate the strawberries.
Gently fold in the diced strawberries into the cheesecake filling. This adds both flavor and color to the filling, making it more appealing. Be cautious not to overmix; you want to maintain the lightness of the whipped cream while evenly dispersing the strawberries throughout the filling.
Step 4: Prepare the strawberry crunch topping.
In a separate bowl, combine the crushed graham crackers and melted butter. Mix until the butter is evenly distributed, and the mixture resembles wet sand. This topping adds a delightful crunch and burst of sweetness, imitating the traditional cheesecake crust and providing a nice textural contrast to the smooth filling.
Step 5: Assemble the tacos.
Once the taco shells are baked and slightly cooled, fill each taco shell with a generous amount of cheesecake filling. There’s no need to rush; fill them to your liking, then sprinkle the strawberry crunch topping over each taco. This is when you can let your creativity shine, as you can add as little or as much crunch as you desire.
Step 6: Chill and serve.
After assembling the tacos, place them in the refrigerator for at least 30 minutes. This chilling time helps the flavors meld together and sets the filling, making it easier to eat. Once they’re set, they're ready to be served to your guests, providing a refreshing and indulgent end to any meal.

The Art of Crunch: Mastering the Topping
The strawberry crunch topping is a pivotal element that elevates these tacos from simple to sensational. It introduces a delightful texture that balances the creamy cheesecake filling. To achieve the perfect crunch, be sure to mix the graham cracker crumbs with just enough melted butter to keep it cohesive but not greasy. This topping can also be modified with added spices or nuts to create captivating variations.
Strawberries: The Star of the Show
Fresh strawberries are not only beautiful but also flavor-packed. When choosing strawberries, look for ones that are firm and brightly colored with their green tops still attached. Depending on their sweetness, you can adjust the amount of powdered sugar added to the filling. Experimenting with different berry types, such as raspberries or blueberries, can bring a whole new flavor profile to these tacos while still keeping them fresh and light.
Creative Customizations for Your Tacos
One of the greatest aspects of strawberry crunch cheesecake tacos is their versatility. Feel free to explore creative variations by adding your favorite flavors to the cheesecake filling, such as lemon zest or a hint of almond extract. You can also personalize the toppings based on what you have on hand, from chocolate shavings to dollops of whipped cream. Each variation gives a fresh take while still honoring the original dessert.
FAQs
What can I do if my cheesecakes are too thick?
If your filling turns out thicker than desired, try gently folding in little more whipped cream to achieve a lighter texture. This will help balance the density and ensure a delightful mouthfeel.
Can I use different fruits for filling?
Absolutely! While strawberries are a classic choice, feel free to swap them out for other berries like blueberries or even mango for a tropical twist. Adjust the sugar accordingly based on the fruit's sweetness.
What size taco shells work best for this recipe?
Mini taco shells work best if you want bite-sized treats, while regular-sized ones hold more filling. Adjust your ingredient amounts depending on the shell size you choose for optimal filling ratios.
How can I make the fillings lighter if too dense?
To lighten the filling, consider incorporating more whipped cream or even a splash of milk. This will add airiness and prevent the filling from feeling too heavy.
Can I use sugar alternatives in the filling?
Yes, sugar alternatives like stevia or erythritol can be used instead of powdered sugar. Do a taste test as these substitutes vary in sweetness levels, ensuring balanced flavors.
What should I do if my taco shells break when assembling?
If your taco shells are breaking, ensure they were adequately baked until crispy. If you're still having issues, consider warming them slightly in the oven before assembling to improve flexibility.
Conclusion
Strawberry crunch cheesecake tacos marry flavor, texture, and fun into a delightful dessert. With each bite, you're met with the satisfying crunch of the shell, the lusciousness of the cheesecake, and the refreshing burst of strawberries. They not only look stunning on a platter but also invite everyone to customize their own perfect taco.
Encouraging creativity in the kitchen is what these tacos are all about. You can easily adapt the flavors to suit your preferences and the seasons. So, gather your ingredients, invite a few friends or family members over, and create a memorable dessert together.
Recipe Card
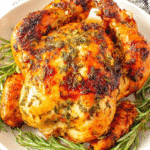
Savory Garlic Herb Roasted Chicken Delight
Ingredients
- 1 whole chicken 3-4 lbs
- 6 cloves garlic minced
- 3 tablespoons olive oil
- 2 tablespoons fresh rosemary chopped
- 2 tablespoons fresh thyme chopped
- 1 lemon zested and juiced
- Salt and pepper to taste
Instructions
- Preheat your oven to 425°F (220°C).
- Prepare the chicken by rinsing and patting it dry with paper towels.
- In a small bowl, mix the olive oil, minced garlic, chopped rosemary, chopped thyme, lemon zest, lemon juice, salt, and pepper.
- Rub the herb mixture all over the chicken, ensuring to get under the skin where possible.
- Place the chicken breast-side up on a roasting pan.
- Roast the chicken for 1 hour to 1 hour and 15 minutes, or until the internal temperature reaches 165°F (74°C).
- Let the chicken rest for 10-15 minutes before carving.
- Carve and serve your Garlic Herb Roasted Chicken.
Notes
Additional serving suggestions: pair with a crisp salad, garlic bread, or roasted seasonal vegetables for balance.
For make-ahead, prep components separately and assemble just before heating to preserve texture.
Taste and adjust with acid (lemon/vinegar) and salt right at the end to wake up flavors.


